
You are using an out of date browser. It may not display this or other websites correctly.
You should upgrade or use an alternative browser.
You should upgrade or use an alternative browser.
Guitar #2...Cedar
- Thread starter Chris C
- Start date
- Status
- Not open for further replies.
Progress update...

I installed a low profile 2-way truss rod and the headstock veneer.

Rough shaped the heel..

Jointed, joined and thicknessed the Sitka spruce soundboard. This is a AA grade top (lower grade) from StewMac.

Re-sharpened for this job...didn't need any tearout.

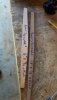
The braces...I planed them to approximate size and put on the correct radius.
.jpg")

The soundboard cut to rough oversize shape....that's a nice tight joint. With that wide grain it's nearly impossible to see.
I installed a low profile 2-way truss rod and the headstock veneer.
Rough shaped the heel..
Jointed, joined and thicknessed the Sitka spruce soundboard. This is a AA grade top (lower grade) from StewMac.
Re-sharpened for this job...didn't need any tearout.
The braces...I planed them to approximate size and put on the correct radius.
The soundboard cut to rough oversize shape....that's a nice tight joint. With that wide grain it's nearly impossible to see.
Attachments
Chris,
Bracing needs to be much thinner...... (taller is better than fatter.....).... but still needs to be thinner than what your showing....... Suggest looking at sculpted bracing on the web....... attach some drawings if you haven't seen them..... this is where making a number of instruments and trial and error helps. Some are now drilling holes to lighten the structure of the brace.....and not distracting from the structural purpose of the brace.
kw
Thanks...but I know. These are rough sized only. The thickness and height will conform to what Cumpiano suggests in his book...which I am using as a guide. I'll carve them after I attach them to the soundboard....again as Cumpiano suggests.Chris,
Bracing needs to be much thinner...... (taller is better than fatter.....).... but still needs to be thinner than what your showing....... Suggest looking at sculpted bracing on the web....... attach some drawings if you haven't seen them..... this is where making a number of instruments and trial and error helps. Some are now drilling holes to lighten the structure of the brace.....and not distracting from the structural purpose of the brace.
kwView attachment 21279
,


Chris,
Your probably tired of my suggestions........We have used the fiberglass rods and decided we really thought white oak strips worked better. If you insist on the fiberglass rods buy them from a kite company such as http://intothewind.com/ItemSearch--search-Fiberglass-Rod--srcin-1. One other suggestion is to make or borrow a sanding disk in the correct radius to lay your top in while you use the go board deck. When we make a violin we also use a dish / violin cradle ....for clarity showing what a violin cradle with radius looks like.


 Middle Son Erick in Photo....
![wwkw[4].JPG](https://ncwoodworker.net/forums/data/attachments/16/16110-b220436d54360b7018f5ec661b22de41.jpg "wwkw[4].JPG") Luthier 15 degree dish
Luthier 15 degree dish 
Your probably tired of my suggestions........We have used the fiberglass rods and decided we really thought white oak strips worked better. If you insist on the fiberglass rods buy them from a kite company such as http://intothewind.com/ItemSearch--search-Fiberglass-Rod--srcin-1. One other suggestion is to make or borrow a sanding disk in the correct radius to lay your top in while you use the go board deck. When we make a violin we also use a dish / violin cradle ....for clarity showing what a violin cradle with radius looks like.
Middle Son Erick in Photo....Luthier 15 degree dish Nope...I appreciate your advice. For the time being I'll use the fiberglass rods....I bought around 10 driveway reflectors at Wally world for $2 apiece and cut them in half. Picked up some thread protectors from big blue box for the ends. Came out good.
I've experimented and they'll do fine for now. I'll look at the oak ...seems like I've seen that done on the net.
As for the radius dish...thought about it. I have the edges of my assembly board raised 3/32 around the rim for this purpose. Should be enough for the soundboard...not sure about the back but we'll cross that bridge when I get there.


Chris,
One thing we started doing after number 50 was coating the inside with a very thin coat of shellac (top, back, sides prior to assembly)....... you will find pro's and con's in doing this..... if you where to ask for a general consensus you get all kinds of opinions.... I built reproduction furniture prior to guitars and always coated the inside of each piece with some kind of sealer and found that it helped tremendously with wood movement. My thinking for the guitars is humidity changes occur less quickly if a piece is sealed on all sides and especially with the materials being so thin........we couldn't determine a change in the sound of the instrument when we sealed the inside both by ear hearing and electron measuring instruments. All the old masters for years have put something on the violins.
We actually had less top failures when we did this and the tops showed less age when we did this. It also makes glue cleanup a little easier if you happen to drop a little where it shouldn't be when you put top and back to sides. (don't forget ...Be sure to tape where you have glue joints so as not to have to cut or sand, sealer away and you have raw wood for glue joints..... if you do decide to seal ...... don't ask how I know....)
Just a thought.


Ready for the end graft...just scored the lines and chiselled out the waste. That juniper is really soft...tough to work even with a really sharp chisel.
If you don't have a twin screw Moxon vise you really don't know what you’re missing...

Cherry wedge cut (wet with a little alcohol) ....still needs a little tuning.
I finally got to do a little work on the guitar today. I glued in the end graft....that's it. I really need to get busy.

That cedar is so soft...it wants to chip at every edge. I have a few places to fix... a little sanding/scraping should do the trick. One or two spots might require an actual repair but nothing too serious.
I started sizing the binding today also but I need a different bearing(s) for my rabbeting bit before I can cut the channel.
I finally got to do a little work on the guitar today. I glued in the end graft....that's it. I really need to get busy.
View attachment 21826
That cedar is so soft...it wants to chip at every edge. I have a few places to fix... a little sanding/scraping should do the trick. One or two spots might require an actual repair but nothing too serious.
I started sizing the binding today also but I need a different bearing(s) for my rabbeting bit before I can cut the channel.
Maybe try scoring the line deeply with a razor knife first - This seems to work really well for me for avoiding chipout.
BTW great WIP thread i check in from time to time and see how things are coming along. If people only knew how many hours go into building a guitar they would be amazed...
- Status
- Not open for further replies.