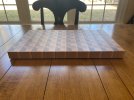
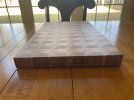
My son and I just finished a 3D cutting board. Considering it was our first try - we're pretty happy with how it turned out. 16 separate glue ups (not my strong suit). We didn't mill the wood correctly so it made for a little extra work.
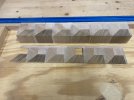
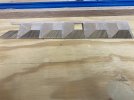
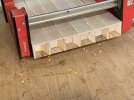
We glued up 2 pieces cut at 45 degrees (afromosia / cherry) then glued in the center square (maple). The maple square was slightly smaller than the height of the cherry / afromosia so each strip was planed. Then we glued the quartersawn maple strips to one side (all at once) then planed and glued the other side (all at once). Then we glued them all together (that's the unfinished picture below). We then cut strips and flipped 90 degrees to create the board. My son may have some of the in-progress pictures. It takes me a while to figure out how you'd make a board like this.
When you look at the board - your eye won't go to the few squares that aren't perfect. So psyched with the board. It's a retirement gift for a friend of Linc's.
Attachments

Last edited: