
upgrade
-

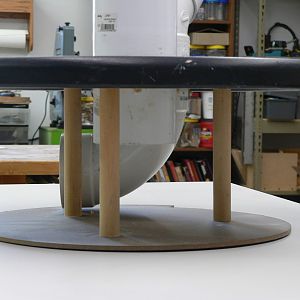
Body upgrade for a $3 dulcimer
My friend, Mimi, brought a dulcimer to me, for which she had paid $3, and it had a body of corrugated cardboard; she asked me to make a wood body for it. Here is what I came up with: I used 1/4 Oak 2 x 4 foot precut, with one side birch, which I used out for the face, with the oak out...- johnpipe108
- Thread
- body dulcimer upgrade
- Replies: 4
- Forum: General Woodworking
-
W
Workbench Top Upgrade
I have only been dabbling in woodworking for a couple of years. My workbench began as a six foot folding table. From there I began researching work benches. A friend of mine bought a home and found a workbench left behind. (in the back ground) He had no need for it and gave it to me. You...- Wilmingtonian
- Thread
- top upgrade workbench
- Replies: 19
- Forum: Workshop Discussion
-

I'll miss my Dewalt 735 planer....
now, with only 2 of the Delta Ap400 1 hp dust collectors in the shop, what will I need to handle this efficiently? And it will have a hard time topping my DW735! That was a sweet planer!- redhawknc1
- Thread
- 735 dewalt fromor miss planer upgrade
- Replies: 9
- Forum: Power Tools and Their Use
-
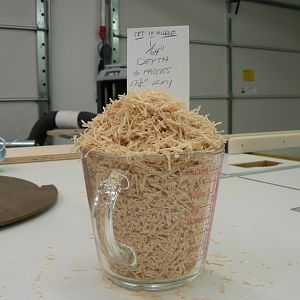
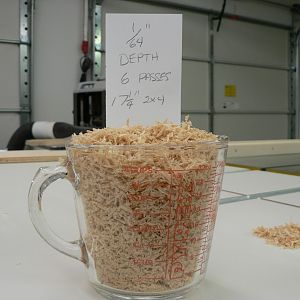
4th. Test
Elbow was moved to the 2nd position (middle). A 17-1/4'' 2x4 was passed through the planer 6 times, at 1/64'' depth. Performance appeared to be a little better about 5+ cups of sawdust was collected.- KC7CN
- Media item
- phil pre-separator test thien upgrade
- Comments: 0
- Album: Dust Collector Pre-Separator Baffle Upgrade
-
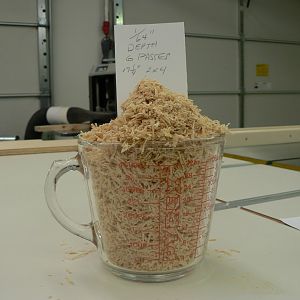
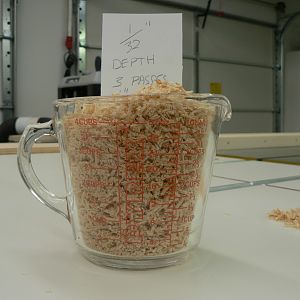
3rd. Test
The elbow was moved to the 1st (original) position. A 17-1/4'' 2x4 was passed through the planer 6 times, at 1/64'' depth. Performance improved - about 5 cups of sawdust was collected.- KC7CN
- Media item
- phil pre-separator test thien upgrade
- Comments: 0
- Album: Dust Collector Pre-Separator Baffle Upgrade
-
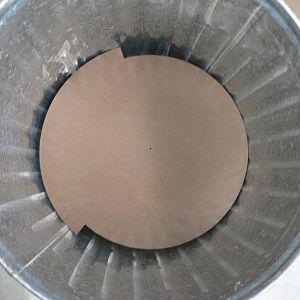
Baffle Fit
Baffle located 8'' below top rim of trashcan. This can is slightly out-of-round, however the perfectly round lid appears to pull it back into shape.- KC7CN
- Media item
- phil pre-separator test thien upgrade
- Comments: 0
- Album: Dust Collector Pre-Separator Baffle Upgrade
-
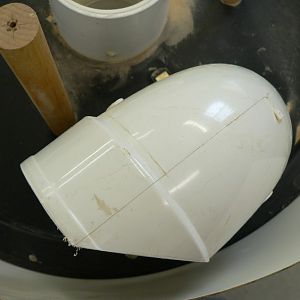
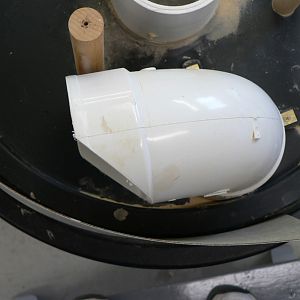
Elbow Detail
Close up of elbow in optimum, 2nd position. The white laminate simulates side of trashcan.- KC7CN
- Media item
- phil pre-separator test thien upgrade
- Comments: 0
- Album: Dust Collector Pre-Separator Baffle Upgrade
-
2nd Test
The elbow was positioned in the 3rd position, close to the side of the trashcan. A 17-1/4'' 2x4 was passed through the planer 6 times, at 1/64'' depth of cup. A little over 4 cups of sawdust was collected.- KC7CN
- Media item
- phil pre-separator test thien upgrade
- Comments: 0
- Album: Dust Collector Pre-Separator Baffle Upgrade
-
1st Test
The elbow was positioned in the 3rd position, close to the side of the trashcan. A 17-1/4'' 2x4 was passed through the planer 3 times, at 1/32'' depth of cup. A little over 4 cups of sawdust was collected.- KC7CN
- Media item
- phil pre-separator thien upgrade
- Comments: 0
- Album: Dust Collector Pre-Separator Baffle Upgrade
-
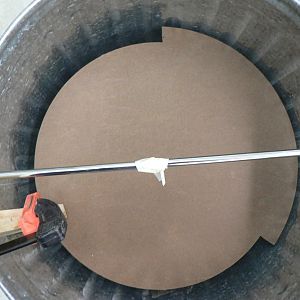
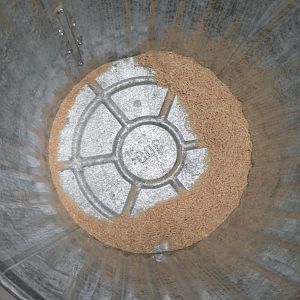
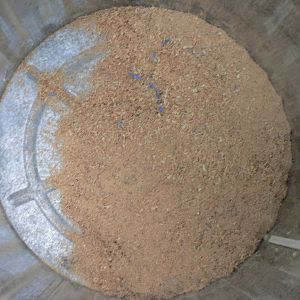
Baffle Pattern
The baffle was place in the bottom of the can to show to illustrate the sawdust pattern.- KC7CN
- Media item
- phil pre-separator test thien upgrade
- Comments: 0
- Album: Dust Collector Pre-Separator Baffle Upgrade
-
Trashcan Sawdust
The dust collector was run for 1 minute to see where the sawdust settled in the bottom of the can.- KC7CN
- Media item
- phil pre-separator test thien upgrade
- Comments: 0
- Album: Dust Collector Pre-Separator Baffle Upgrade
-
Output Port
- KC7CN
- Media item
- phil pre-separator thien upgrade
- Comments: 0
- Album: Dust Collector Pre-Separator Baffle Upgrade
-
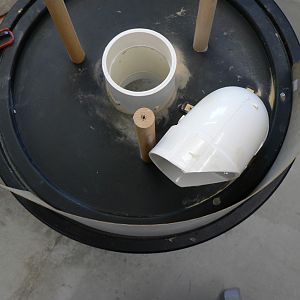
3rd. Elbow Postion
Orientation even closer to side of can.- KC7CN
- Media item
- phil pre-separator thien upgrade
- Comments: 0
- Album: Dust Collector Pre-Separator Baffle Upgrade
-
Initial Test
The first test was to empty the box under my table saw. I expected more sawdust in the can; this appears to be less than half the quantity removed. Note the pieces of blue masking tape.- KC7CN
- Media item
- phil pre-separator thien upgrade
- Comments: 0
- Album: Dust Collector Pre-Separator Baffle Upgrade
-
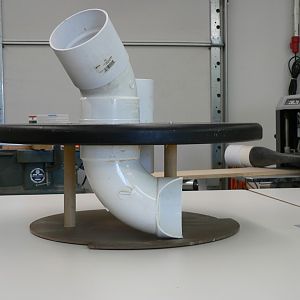
Inut Elbow
1st. Orientation.- KC7CN
- Media item
- phil pre-separator thien upgrade
- Comments: 0
- Album: Dust Collector Pre-Separator Baffle Upgrade
-
2nd. Elbow Position
Orientation moved closer to side of can.- KC7CN
- Media item
- phil pre-separator thien upgrade
- Comments: 0
- Album: Dust Collector Pre-Separator Baffle Upgrade
-
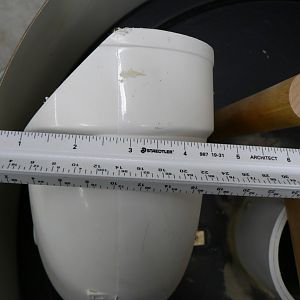
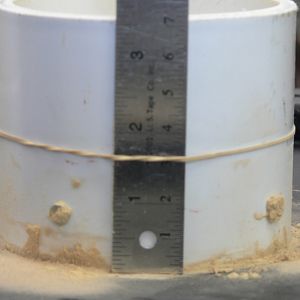
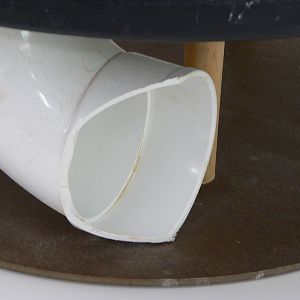
1st. Elbow Position
Note orientation with respect to 1'' dowel. Temporary piece of white Formica in lid grove simulates side of trashcan. The objective is to find optimum location.- KC7CN
- Media item
- phil pre-separator thien upgrade
- Comments: 0
- Album: Dust Collector Pre-Separator Baffle Upgrade
-
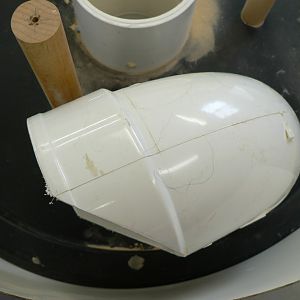
Elbow Detail
Corner of Elbow is cut 45 degree's.- KC7CN
- Media item
- phil pre-separator thien upgrade
- Comments: 0
- Album: Dust Collector Pre-Separator Baffle Upgrade
-
Input Elbo
- KC7CN
- Media item
- phil pre-separator thien upgrade
- Comments: 0
- Album: Dust Collector Pre-Separator Baffle Upgrade
Premier Sponsor
Our Sponsors
LATEST FOR SALE LISTINGS
-
-
-
 SOLD -- $75: Gast moa v113 Vacuum Pump Veneer, 60" bag and board
- Started by peterdnight
- Replies: 1
-
GONE: Gladiator 5 cleats, 10 hangers, Paper Towel and Shelf
- Started by peterdnight
- Replies: 3
-
SOLD -- $100 Makita mac700 portable air + grex pin nailer + 2 others + 50' hose
- Started by peterdnight
- Replies: 1