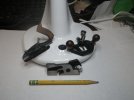
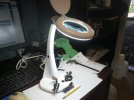
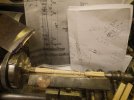
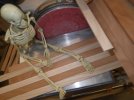
got a gift card from work for the holidays,, Lee Valley ended up with most of it,, added to my small functional plane collection (the others have been working great!!) magnifying desk lamp was on sale,, much better than expected,, Real glass!!! ball joint on top, allen wrench for mid joint is stored in the base....

You are using an out of date browser. It may not display this or other websites correctly.
You should upgrade or use an alternative browser.
You should upgrade or use an alternative browser.
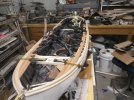
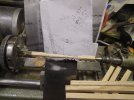
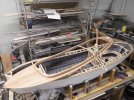
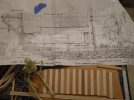
work in progress, 1/6th 1890's navy steam launch built to navy plans
- Thread starter tghsmith
- Start date
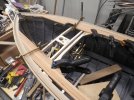
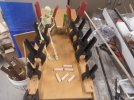
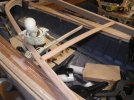
with a little bit of sadness, sawed the deck planking stock on my Byrnes table saw..(hopefully they will stay in production) installed some "shelfs" bow and aft for the deck planks to rest on,, (plans are for the decking and coaming to removable as one section,, the 100 year old+ heart pine actually steams well, main long planks cut and clamped in place.. this boat would of had whitish caulking between the planks,, did a test with add white pigment to Tite-bond III with great results, strong joints with white seams..
Attachments

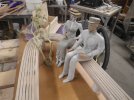
Beautiful work. You have to give Slim a break, he's working way to many hours. Thanks for posting the process.
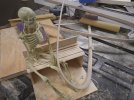
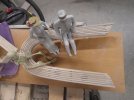
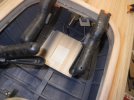
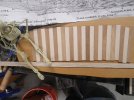
I promoted Slim to "Lord of the Clamps" but he found out it didn't come with a pay raise.. back to shop inspector.. used my home-built dremel router table to rough out the edge section of the wrap-around stern bench.. lots of rasping and sanding to finish it up, thankfully the rest of the seat parts are much less complex.. I think it passes Slim's approval..
Attachments
Nice work! I look forward to more progress pictures.
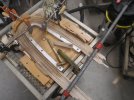
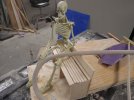
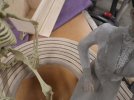
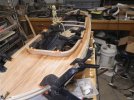
one more steam bent ash part and it was time to put the rear bench together, rigged a jig board to hold things in place for the glue-up,, it still needs a bit more sanding and the brass hardware as the original..
Attachments
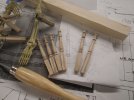
Great work, what type of wood do you use for such thin pieces?took me 8 tries to get the needed 6 turnings that look close enough like each other..
as I'm trying to stay with the wood types spec'ed in the plans these were done in ash, (ash that came from northern Wisconsin) selected for the finest grain,, doing them in a finer hardwood (boxwood, apple, holly) may have been easier but they will do the job..
Last edited:
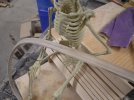
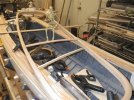
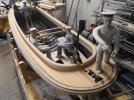
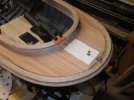
maybe. hopefully the last steam-bent part!!! the cross cockpit arched coaming cap rail.. planking is moving along at about three planks per section per day.. each plank has a slight taper so if things go well they will meet evenly at the center line..
Attachments
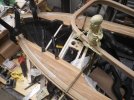
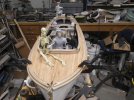
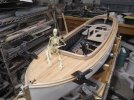
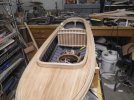
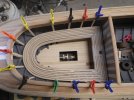
coaming glued to the deck!!!! work stared on the planked floor sections, the stern floor gets an ash grating in the access hole (will have to rig a jig to make the parts on my small router table..
Attachments

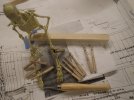
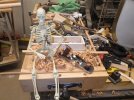
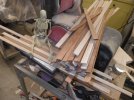
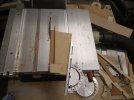
spent a bit of time with the Byrne's tools (table-saw and thickness sander) just how precise are they.. 1/2 inch wide by 1/8th inch thick tongue and groove ash and cherry for the interior staving..
Attachments

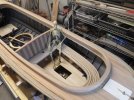
finished the cross section of the seating bench,, the hole is for fitting a sailing mast and gets a brass ring+cover.. T & G staving boards are in place for the main bulkhead,, time spent making the stock is given back during installation!!! photo showing the deck lifts of for interior hull access..
Attachments
the curve around the stern is slightly angled back where the slat boards go from the bench to the coaming.. rigged a taper jig on the table saw and prepped stock to get around this section,, it still has to be T&G'ed but hopefully things will work out when I get to the sides of the bench..
Attachments
Premier Sponsor
Our Sponsors
LATEST FOR SALE LISTINGS
-
-
-
-
 SOLD -- $75: Gast moa v113 Vacuum Pump Veneer, 60" bag and board
- Started by peterdnight
- Replies: 1
-
GONE: Gladiator 5 cleats, 10 hangers, Paper Towel and Shelf
- Started by peterdnight
- Replies: 3