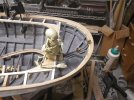
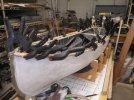
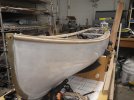
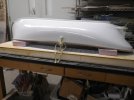
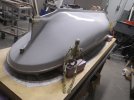
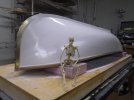
the laminated stern molding came out of the the form and matched the stern nicely.. sanded the bottom flat, trimmed the height on the little table-saw,, shaped it on the router table,, made some clamp blocks to help with the profile and angles to get it clamped in place, left it clamped in place most of the day before gluing it in place, the fit required less clamping force,, happy with the results, third times a charm..

You are using an out of date browser. It may not display this or other websites correctly.
You should upgrade or use an alternative browser.
You should upgrade or use an alternative browser.
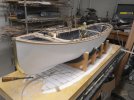
work in progress, 1/6th 1890's navy steam launch built to navy plans
- Thread starter tghsmith
- Start date
OK,
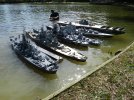
We NEED these ships at the EXTRAVAGANZA to show folks...... How can we make this happen? This is AWESOME.....
Coleman
We NEED these ships at the EXTRAVAGANZA to show folks...... How can we make this happen? This is AWESOME.....
Coleman
Extravaganza? ,, shaped the white oak stock for the fender strips,, started up the steamer pot after the areas that needed the most bending had an overnight soak.. looks like all bended well,, overnight in the clamps before fitting and glue..
Attachments
date and distance will be a no go for me,, the 13,14,15 is the fleet gathering at rocky mount city lake (a very large gathering of 1/96th and 1/100 scale R/C warships) and a massive halloween to set up.. having a large dead oak and several big pines taken down mid Oct..
Attachments


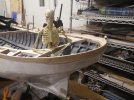
fender strip/rail fitted and glued, left it a little large knowing the clamps would mess it up a bit.(lots of clamps to get the strip around the stern) thinking of making a small scraper to get the fending to its final shape.. gave Slim the weekend off, all in all a good progress this week..
Attachments
How about a tutorial for our Resource forum on sharpening and keeping that fender profile in the scraper sharp, please!needed to get the fender to a better final shape/profile,, cabinet scraper and some dremel work,, so far so good
the little scraper did its job, the ground edge held up well only needing burneshing with a rod once and some flat honing,, more used a rough tool to take away wood than a fine scraper.. with the fender profiled better a shaped hardwood sanding block was made to even things out,, will go one more grade finer.. Will really be happy when the white oak work is done on this model!!!
Attachments

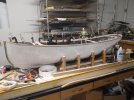
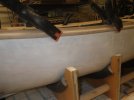
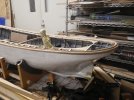
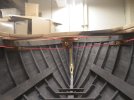
with the fender rail shaped in it was time for hull finishing. fill, sand and prime.. fill, sand and prime.. fill, sand and prime, ect ect ect... managed to get things where they needed to be early this morning and get the final topcoat on before the weather turned. cool but still dry, paint layed on very nice.. she'll sit for the next three days,, after that the hull brightwork will get cleaned off (not going to hide the brass)
Attachments
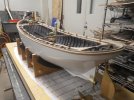
brass-work cleaned up,, back in the stand, a model building friend sent me some cable to test as steering cable,, looking great, it's scale size and will tight wrap around the Iron-wood steering drum with no memory.. (iron-wood lives up to its name, I turned the drum on a small metal working lathe)
Attachments
You must have the patience of Job! Great work.
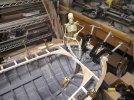
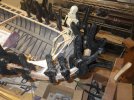
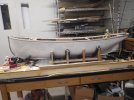
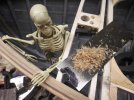
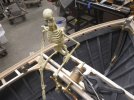
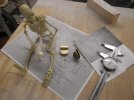
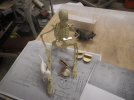
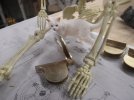
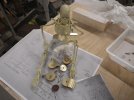
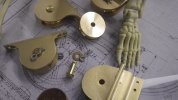
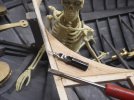
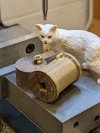
Brass work again, started work on the for and aft sheave holders for the steering cables,, lots of silver soldering and some percussive work.. time to get on the lathe and make the sheaves..(Slim now has an assistant inspector who looks at things more judgmentally than he does)
Attachments

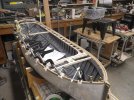
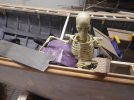
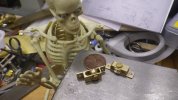
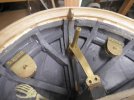
a "little" more brass work and a little wood work,, small pair of guide rollers that get the cable along the inside curve of the hull,, mounting fixtures for the aft pullies, milled some W-oak to match the pully shape, then cut and shaped them to the hull beams, pre-drilled them before they were epoxied in place.. dowel pin was added to keep the position correct during curing..
Attachments
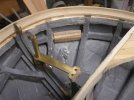

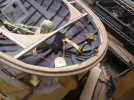
things looking better this morning, cleaned up the hull mounts and frames, gave it a some paint, reground a screw countersink bit for the size #1 brass wood screws (slotted as philips head wasn't around yet in 1890) thinking that these guys are mounted pretty solid..
Attachments
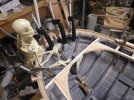
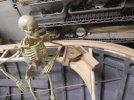
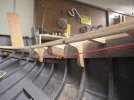
rigged the steering system with string to get the pully's placement correct,, made some fixtures for the steering drum to lock the cables in place,
Attachments
Premier Sponsor
Our Sponsors
LATEST FOR SALE LISTINGS
-
-
-
 SOLD -- $75: Gast moa v113 Vacuum Pump Veneer, 60" bag and board
- Started by peterdnight
- Replies: 1
-
GONE: Gladiator 5 cleats, 10 hangers, Paper Towel and Shelf
- Started by peterdnight
- Replies: 3
-
SOLD -- $100 Makita mac700 portable air + grex pin nailer + 2 others + 50' hose
- Started by peterdnight
- Replies: 1