Small blanket chest project

Charlie Buchanan

Charlie
Corporate Member
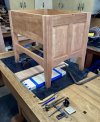
My wife wants a sitting place in the bathroom. Not a shower seat but a place to sit while dressing, etc. I thought of a small blanket chest to match the cherry vanity I built for the bathroom a couple of years back. I worked out this design to fit into the space. It’s about 26” x 20” x 21” high—a little higher than a side chair.
chest.jpeg
chest.jpegThe top will be hinged over a storage space and there is a drawer below the storage. The construction is frame and panel (or post and panel—whatever the correct term).
I’ve just started construction and will post photos as I move along.

IMG_0532.jpeg
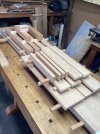
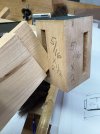
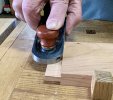
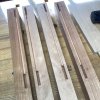
IMG_0534.jpegIMG_0538.jpegStarting with the legs milled to size and still square I laid out and cut the mortises using a bench mortiser, cleaned the mortise out with chisel and made a sample block from a leg cut-off. The sample lets me try the tenons for fit without using the legs.
IMG_0541.jpeg
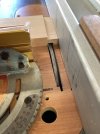
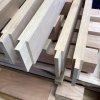
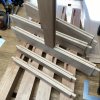
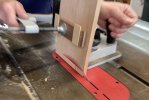
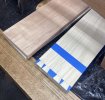
IMG_0541.jpegIMG_0544.jpegAfter milling the rails to size I cut the tenons using a box joint set on table saw. Rails are cut to tenon shoulder length plus 1 1/2“ since I’m using 3/4” tenons on this job. I’ve used different methods but this seems to work best for me.
IMG_0546.jpeg
IMG_0546.jpeg
IMG_0549.jpeg
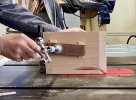
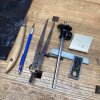
IMG_0549.jpegTesting the tenon setup for tenon thickness and centering. I use a cutoff from a milled rail to dial in the tablesaw setup. I'm Using 5/16”mortises and tenons here.
 
Last edited:

Dee2

Board of Directors, Vice President
Gene
Staff member
Corporate Member
My wife wants a sitting place in the bathroom. Not a shower seat but a place to sit while dressing, etc. I thought of a small blanket chest to match the cherry vanity I built for the bathroom a couple of years back. I worked out this design to fit into the space. It’s about 26” x 20” x 21” high—a little higher than a side chair.
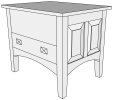
View attachment 227250The top will be hinged over a storage space and there is a drawer below the storage. The construction is frame and panel (or post and panel—whatever the correct term).
I’ve just started construction and will post photos as I move along.
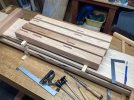
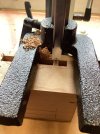
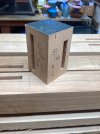
Starting with the legs milled to size and still square I laid out and cut the mortises using a bench mortiser, cleaned the mortise out with chisel and made a sample block from a leg cut-off. The sample lets me try the tenons for fit without using the legs.
After milling the rails to size I cut the tenons using a box joint set on table saw. Rails are cut to tenon shoulder length plus 1 1/2“ since I’m using 3/4” tenons on this job. I’ve used different methods but this seems to work best for me.
Testing the tenon setup for tenon thickness and centering. I use a cutoff from a milled rail to dial in the tablesaw setup. I'm Using 5/16”mortises and tenons here.
As you continue, the compilation recording your work will make a great addition to the Resource forum. Please consider.
 

Charlie Buchanan

Charlie
Corporate Member
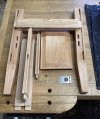
Next phase fit each tenon, assemble components dry for test fit and confirm measurements for drawer runners.
IMG_0600.jpeg
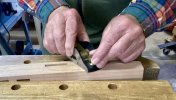
This little skew plane is great for refining the tenons for a tight fit. It’s a left-hand skew so it runs tight to the shoulder for a right handed person.

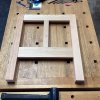
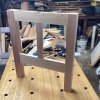
IMG_0614.jpegThe left end component framefitted and dry assembled.

IMG_0613.jpegIMG_0615.jpeg
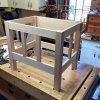
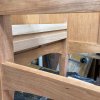
The full frame dry fit seen from rear corner. Next, disassemble and run the panel grooves on the table saw.
IMG_0617.jpegIMG_0618.jpeg
Next to come: make the panels, shape the curve on the bottom rails, and taper the legs below bottom rails—-coming soon
 
Last edited:

Charlie Buchanan

Charlie
Corporate Member
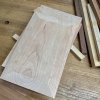
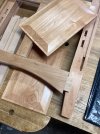
Now that frames and posts are dry fit and grooved it’s panel time. I confirmed the measurements for the panels from assembled dry-fit. After cutting to size I’ve found the best way to start the panel-raising process is to cut a rough bevel on table saw to remove bulk of the waste.

IMG_0633.jpegIMG_0639.jpegIMG_0682.jpeg
i use a tenon jig tilted to the right overall angle cutting across grain first, then along grain. Works great for small panels. This produces a simple bevel which is then shaped with a panel-raising router bit.
IMG_0686.jpegIMG_0703.jpeg
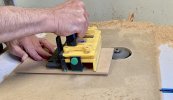
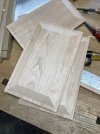
since I removed the majority of the waste on the saw only one pass of the panel-raiser is needed. I use a gripper to push the panel across the bit for added safety.
At this point only finish sanding and final fit check are needed.

If this were a period piece I would have done the shaping after sawing the bevel with hand planes to get a period surface. But it’s not; so a machined and sanded surface is good.
 
Last edited:
Charlie Buchanan

Charlie
Corporate Member
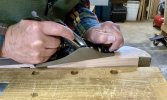
With all the panels raised, fitted and sanded it’s time for tapering the legs i want to dry assemble to get a first look at a side component. Because this is a short 5 1/2 inch taper I marked them out and cut them freehand on the bandsaw. After the saw it I planed across grain to remove the ridge at the end of the bandsaw cut.
IMG_0708.jpeg IMG_0711.jpeg IMG_0712.jpeg
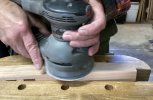
Next I planed the taper to remove saw marks, and finally hit them with 220 grit on a ROS.
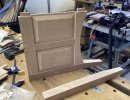
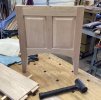
Now I can assemble the right end component for a look.
IMG_0713.jpegIMG_0715.jpeg
Next step is pre-finishing the panels before assembly. A couple of dry days should allow the panels time to dry. Then a couple of glue-up sessions assembling ends, back and front panels, and finally joining all the components together to form the case. Twenty-eight MT joints altogether in the case.
 

Charlie Buchanan

Charlie
Corporate Member
Panels have been prefinished with a shellac sealer then a couple of coats of satin polyurethane wiped on. Frame has been shellac sealed and sanded ready for glue-up.
IMG_0726.jpeg IMG_0728.jpeg IMG_0724.jpeg
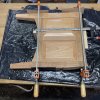
Parts are assembled for one of the end components and glued up. I glue up the end panels and the rear panel. The end components incorporate a tenoned guide for the side-hung drawer.
IMG_0725.jpeg Rear panel assembly will connect the end components.
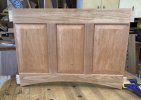
The front of the piece is a wide solid panel at the top with a flush drawer at bottom. Once the case is together I’ll make the drawer to fit. The hinged top/seat comes last.
 

Charlie Buchanan

Charlie
Corporate Member
The case is glued up. Ready to make the drawer.
IMG_0746.jpeg
IMG_0748.jpeg IMG_0747.jpeg IMG_0749.jpeg
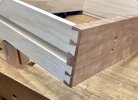
I lay out the tails on poplar drawer sides. I tape the sides together and saw the tails on both sides at once. Since the drawer will be side-hung I leave an extra wide pin in the center so that the drawer front serves as a stop against the hanger rail. The third photo shows the side drawer guides. The groove will be fitted with a hanger rail to engage the groove on the drawer side.
 

Charlie Buchanan

Charlie
Corporate Member
Glueing up the case I was reminded why I like hide glue. I buttered up a set of mortises on one face of a leg—reached for the corresponding rails and realized I had brushed glue in the wrong mortises. With hide glue it was not a big glitch. I wiped out the excess glue with a paper towel wrapped around a stick. Since hide glue is easily reactivated with fresh hot hide I didn’t have to worry about getting all the glue out. And I went ahead with the glue-up.
IMG_0734.jpeg
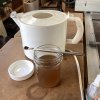
Here’s my cheap glue pot I’ve been using for years. It’s a soup heater from Target with a hole cut in the top to fit a jelly jar. The rim of the jelly jar holds the jar suspended in water. The pot has a thermostat that will keep the water at 145 degrees. I use a food thermometer to monitor the temperature. It takes about 20 minutes to raise the glue to 145 from 60 degrees.
 

Charlie Buchanan

Charlie
Corporate Member
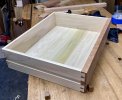
After taking a few days off to take care of other things I got back to the small chest. I glued up and fitted the drawer, glued up and beveled a panel for the bottom.

IMG_0781.jpeg IMG_0782.jpeg
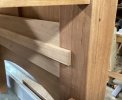
The drawer uses the thickness of the front as a depth stop and the maple hanger strip is set to stop the drawer at the right depth.

IMG_0756.jpeg IMG_0778.jpeg IMG_0783.jpeg

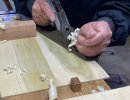
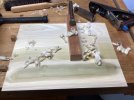
The bottom panel is poplar like the drawer sides-it is beveled on three sides to slide into the groove. I just used the jack plane to bevel the edges. Plane marks are on the drawer bottom. I’ll finish the drawer sides and bottom with shellac just to seal the surface. The groove and slide rail gets some wax occasionally so that it slides smoothly.
 
Last edited:
Premier Sponsor

Our Sponsors

LATEST FOR SALE LISTINGS

Top