Installing Delicate Hardware

Charles Lent

Charley
Corporate Member
I have made a lot of small boxes, and this has always worked best for me.

I always clamp the box and lid together, so as to keep everything perfectly aligned. I then use double sided Scotch Tape to adhere the hinges and latch correctly in their places. I then use the correct size of one of these punches to create a small dimple in the exact center of each of the holes to be drilled. Use the size punch for the size hole in the hardware. These punches aren't expensive, and should last forever in woodworking. Buy a better set if you plan to also use them in metalworking. This set is only $12.


I then usually use an ice pick to force a hole of about the desired depth. Doing this makes a good pilot hole for the screws by compressing the wood around the hole enough to make it stronger. If the screws to be used are brass, it's best to use a steel screw of the same size first. Then remove the steel screw(s) and replace with the brass screw(s). Brass screws break easily when forced into "too tight" holes. Sometimes I have even scraped the threads of the screws with some paraffin or candle wax to make them easier to install, but pre-threading the holes with the steel screw should eliminate the need for wax.

If you have used the double sided tape, remove it once you have used the steel screw to thread the holes and before installing the hardware with the brass screws.

I frequently make boxes with sides thinner than the length of the screws provided with the hardware. For these, I either buy the correct length screws for replacement, or I grind the tips of the hardware package screws flat at the needed length so they don't leave sharp points exposed inside the box. Adding a thin piece of wood to the inside back and front of the box to keep the screw points from being exposed is another possibility.


Charley
 

Canuck

Wayne
Corporate Member
I am curious what tool did you use to cut the top off. I made several boxes very similar to yours and used the table saw to cut the tops off. Since the boxes were deeper than the height of the saw blade I had to rotate the box. I was never happy with the result.
I did it on the table saw, Keye. I covered the cut line with 2" blue tape, cut the two long sides first. I then inserted shims in the long "kerf" and did the same with the end cuts. I did get a slight burning but easily remedied with a little sand paper.
 

Canuck

Wayne
Corporate Member
I have made a lot of small boxes, and this has always worked best for me.

I always clamp the box and lid together, so as to keep everything perfectly aligned. I then use double sided Scotch Tape to adhere the hinges and latch correctly in their places. I then use the correct size of one of these punches to create a small dimple in the exact center of each of the holes to be drilled. Use the size punch for the size hole in the hardware. These punches aren't expensive, and should last forever in woodworking. Buy a better set if you plan to also use them in metalworking. This set is only $12.


I then usually use an ice pick to force a hole of about the desired depth. Doing this makes a good pilot hole for the screws by compressing the wood around the hole enough to make it stronger. If the screws to be used are brass, it's best to use a steel screw of the same size first. Then remove the steel screw(s) and replace with the brass screw(s). Brass screws break easily when forced into "too tight" holes. Sometimes I have even scraped the threads of the screws with some paraffin or candle wax to make them easier to install, but pre-threading the holes with the steel screw should eliminate the need for wax.

If you have used the double sided tape, remove it once you have used the steel screw to thread the holes and before installing the hardware with the brass screws.

I frequently make boxes with sides thinner than the length of the screws provided with the hardware. For these, I either buy the correct length screws for replacement, or I grind the tips of the hardware package screws flat at the needed length so they don't leave sharp points exposed inside the box. Adding a thin piece of wood to the inside back and front of the box to keep the screw points from being exposed is another possibility.


Charley
Thanks a bunch for the detailed explanation of how to get this done right! I do have a set of those HF punches and pulled out my ice pick. I was also thinking double sided tape to hold hinges and latch in place while locating pilot holes.

And thank to all that responded!! (May invest in a set of Gillette too!!😄😄.)

I'll try to remember to post a picture when completed.

Thanks again All.

Wayne
 

JNCarr

Joe
Corporate Member
Any time I'm using brass screws in a harder wood I first screw in a steel screw of the same size. That way there is less risk of breaking or marring the brass screw. Also, stick the end of the screw in a bar of soap or bees wax to make it go in easier.
Absolute must. Even if you dont snap the brass (even with pre-drilling) there's a high chance of mucking up the screw slots.
 

Charles Lent

Charley
Corporate Member
When sawing the lid free, I cut the front and back (opposite sides) first. Then I insert shims held in place with blue tape into these saw kerfs, to keep the kerfs from closing and the top in complete alignment with the bottom during the cutting of the other two sides. Be very careful to keep the box fully against the fence during this complete cutting process too. If the lid remains in the same position relative the the box bottom and the box remains against the fence during all four cuts, only some very light sanding will be needed of the cut edges after the the cutting and box lid has been removed. If you don't install the shims in the saw kerfs before the third and fourth cut the top will move and the kerfs will close, resulting in considerable rework and a shorter box than planned for.

Charley
 

Rick Mainhart

Rick
Corporate Member
Hi Wayne,

For accurately placed punch holes, get yourself a set of transfer punches ... such as these:


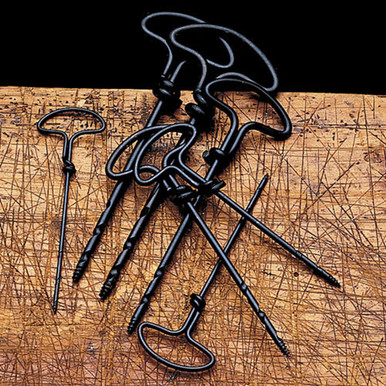
Choose the punch appropriate for the hinge/latch hole, and tappity-tap-tap, you have a very precisely located center punch just ready for that gimlet set you (hopefully) bought.


Regards,

Rick
 

pop-pop

Man with many vises
Corporate Member
Hi Wayne,

For accurately placed punch holes, get yourself a set of transfer punches ... such as these:


Choose the punch appropriate for the hinge/latch hole, and tappity-tap-tap, you have a very precisely located center punch just ready for that gimlet set you (hopefully) bought.


Regards,

Rick


$11.99 at Harbor Freight is another option
 

Canuck

Wayne
Corporate Member
Hi Wayne,

For accurately placed punch holes, get yourself a set of transfer punches ... such as these:


Choose the punch appropriate for the hinge/latch hole, and tappity-tap-tap, you have a very precisely located center punch just ready for that gimlet set you (hopefully) bought.


Regards,

Rick
$11.99 at Harbor Freight is another option
Thanks guys,

I have the HF punch set and ordered a set of gimlet as well.

(The trick in using the punch set with these hinges is that they are very thin resulting in the punch point contacting wood before the punch shank seats in the hinge hole. - Maybe shimming the hinge with double stick tape would resolve.)
 

Canuck

Wayne
Corporate Member
All set…

IMG_6224.jpeg
 

Premier Sponsor

Our Sponsors

LATEST FOR SALE LISTINGS

Top