
router
-
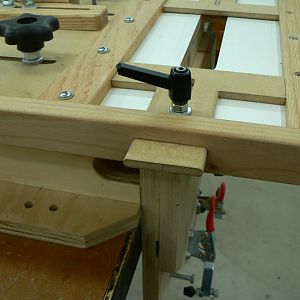
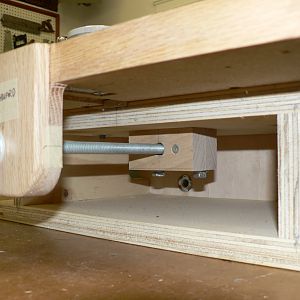
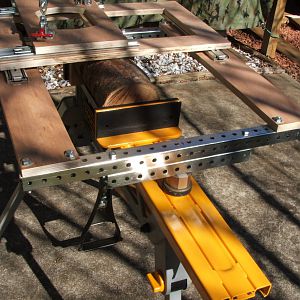
Router end-stop adjustment detail.
- KC7CN
- Media item
- jig mortise mortising plunge router shopnotes
- Comments: 0
- Album: ShopNotes Plunge Router Mortising Jig
-
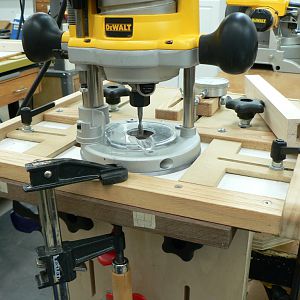
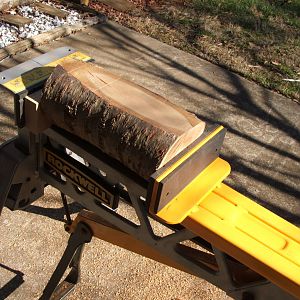
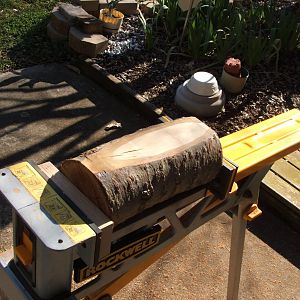
Mortising with plunge router.
- KC7CN
- Media item
- jig mortise mortising plunge router shopnotes
- Comments: 0
- Album: ShopNotes Plunge Router Mortising Jig
-
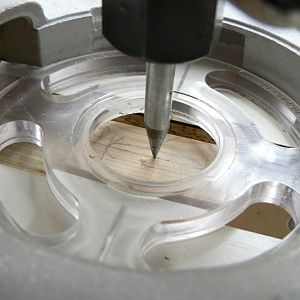
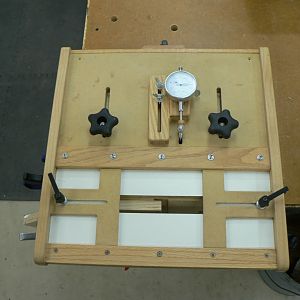
Precise setup.
Use 1/4'' pointed centering pin with micro-adjust for precise table adjustment.- KC7CN
- Media item
- jig mortise mortising plunge router shopnotes
- Comments: 0
- Album: ShopNotes Plunge Router Mortising Jig
-

Table setup
- KC7CN
- Media item
- jig mortise mortising plunge router shopnotes
- Comments: 0
- Album: ShopNotes Plunge Router Mortising Jig
-
Micro-adjust lead screw.
- KC7CN
- Media item
- jig mortise mortising plunge router shopnotes
- Comments: 0
- Album: ShopNotes Plunge Router Mortising Jig
-
Micro-adjust mechanisium
- KC7CN
- Media item
- jig mortise mortising plunge router shopnotes
- Comments: 0
- Album: ShopNotes Plunge Router Mortising Jig
-
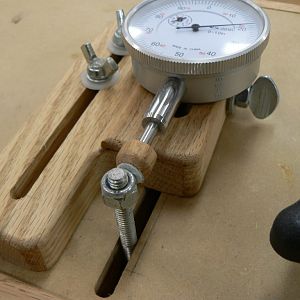
Dial indicator detail.
- KC7CN
- Media item
- jig mortise mortising plunge router shopnotes
- Comments: 0
- Album: ShopNotes Plunge Router Mortising Jig
-
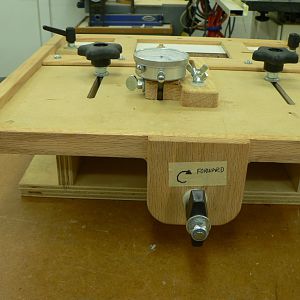
Table micro-adjust knob.
- KC7CN
- Media item
- jig mortise mortising plunge router shopnotes
- Comments: 0
- Album: ShopNotes Plunge Router Mortising Jig
-
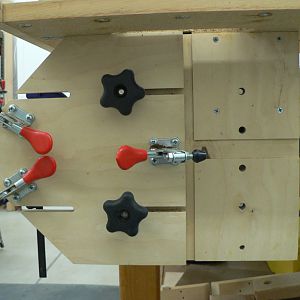
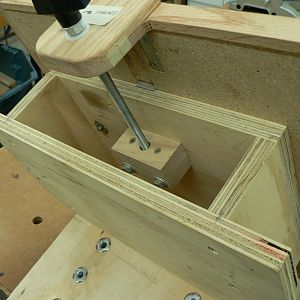
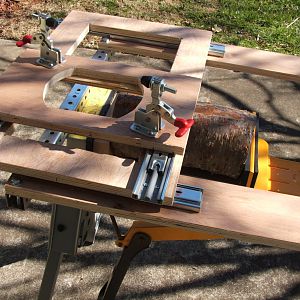
Toggle Clamps
In use, it may be necessary to mount the toggle clamp on a riser block; a simple 3/4 inch plywood spacer with longer screws does the job!- KC7CN
- Media item
- jig mortise mortising plunge router shopnotes
- Comments: 0
- Album: ShopNotes Plunge Router Mortising Jig
-
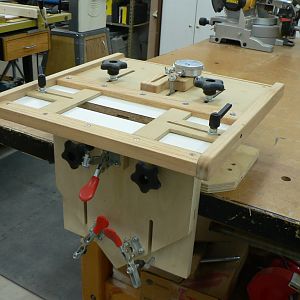
ShopNotes Mortising Jig w/Micro-adjust table.
The basic platform for this mortising jig is based on the ShopNotes jig - Volume 11 Issue 64.- KC7CN
- Media item
- jig mortise mortising plunge router shopnotes
- Comments: 1
- Album: ShopNotes Plunge Router Mortising Jig
-
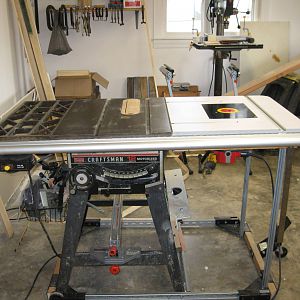
table saw
- Acelectric
- Media item
- router saw table tablesaw
- Comments: 0
- Category: Member Galleries
-
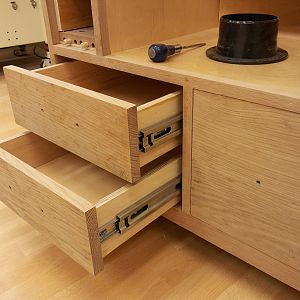
New router table WIP - drawers
- Bas
- Media item
- router table
- Comments: 0
- Album: New workshop
-
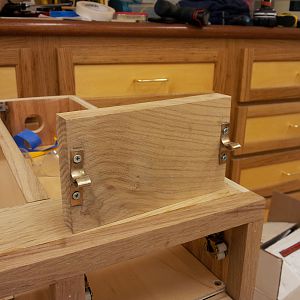
False front for power cord area
- Bas
- Media item
- router table
- Comments: 0
- Album: New workshop


Premier Sponsor
Our Sponsors
LATEST FOR SALE LISTINGS
-
-
-
 SOLD -- $75: Gast moa v113 Vacuum Pump Veneer, 60" bag and board
- Started by peterdnight
- Replies: 1
-
GONE: Gladiator 5 cleats, 10 hangers, Paper Towel and Shelf
- Started by peterdnight
- Replies: 3
-
SOLD -- $100 Makita mac700 portable air + grex pin nailer + 2 others + 50' hose
- Started by peterdnight
- Replies: 1