Hi NCWW,
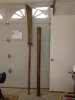
I'm making a QS White Oak training bisento (ancient Japanese anti-calvary weapon) for a friend. I've made one before but this one has a unique twist: essentially I need to be able to ship it at a shorter length (to Colorado) for simple assembly on the other end. To be clear, this would only need to be assembled once on their end. My current solution is basically a tongue and groove with pegs. A blade section with a 18" tang/tongue and a 5ft handle with 18" groove. At present the blade piece is 1" thick. When I make the handle it will be 3 pieces laminated together. Pictured below is a rough design to help.
I'd love advice on a few points:
1) Is an 18" tongue is long enough
2) Diameter and number of pegs
3) Placement of the pegs
3) Peg material. Want to stay with wood, but curious if same or different density/species makes a difference
4) Any other advice is welcome

I'm lucky enough to have MrFixit71's shop and advice (I mean, he IS my dad) at my disposal but extra input is always appreciated. Thanks everyone!
I'm making a QS White Oak training bisento (ancient Japanese anti-calvary weapon) for a friend. I've made one before but this one has a unique twist: essentially I need to be able to ship it at a shorter length (to Colorado) for simple assembly on the other end. To be clear, this would only need to be assembled once on their end. My current solution is basically a tongue and groove with pegs. A blade section with a 18" tang/tongue and a 5ft handle with 18" groove. At present the blade piece is 1" thick. When I make the handle it will be 3 pieces laminated together. Pictured below is a rough design to help.
I'd love advice on a few points:
1) Is an 18" tongue is long enough
2) Diameter and number of pegs
3) Placement of the pegs
3) Peg material. Want to stay with wood, but curious if same or different density/species makes a difference
4) Any other advice is welcome
I'm lucky enough to have MrFixit71's shop and advice (I mean, he IS my dad) at my disposal but extra input is always appreciated. Thanks everyone!