
dropleaf
-
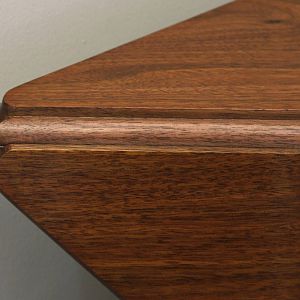
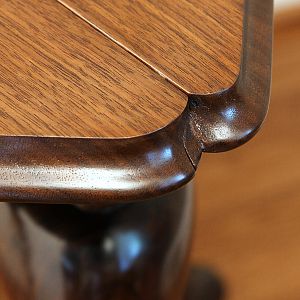
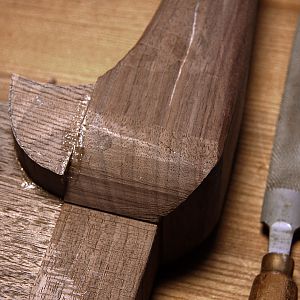
leaf_down_corner_detail
Another detail of the rule joint shape blending with the edge molding. Leaf is down.- Charlie Buchanan
- Media item
- card dropleaf finished handkerchief table
- Comments: 0
- Album: Dropleaf card table
-
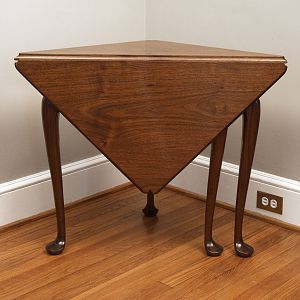
leaf_down
The dropleaf side of the table showing the rule joint open and the triangular leaf. This fits nicely into a corner for storage.- Charlie Buchanan
- Media item
- card dropleaf finished handkerchief table
- Comments: 0
- Album: Dropleaf card table
-
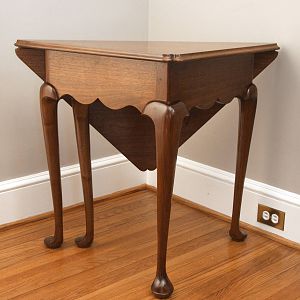
front_corner
This is the "front" corner of the dropleaf table opposite the triangular leaf. This corner is a right angle and the others are 45\'s.- Charlie Buchanan
- Media item
- card dropleaf finished handkerchief table
- Comments: 0
- Album: Dropleaf card table
-
from_the_front_2
Dropleaf card table finished with water soluble dye in a diluted antique red walnut. Then amber shellac, rubbed out and waxed- Charlie Buchanan
- Media item
- card dropleaf finished handkerchief table
- Comments: 0
- Album: Dropleaf card table
-
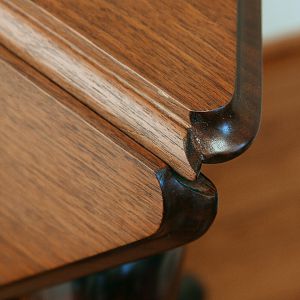
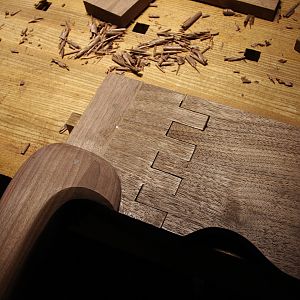
corner_top_up
This shows how the rule joint blends with the edge profile of the table top in this project. The leaf is up in this photo.- Charlie Buchanan
- Media item
- card dropleaf finished handkerchief table
- Comments: 0
- Album: Dropleaf card table
-
corner_open
This shows how the rule joint blends with the edge profile of the table top in this project. The leaf if down in this photo.- Charlie Buchanan
- Media item
- card dropleaf finished handkerchief table
- Comments: 0
- Album: Dropleaf card table
-
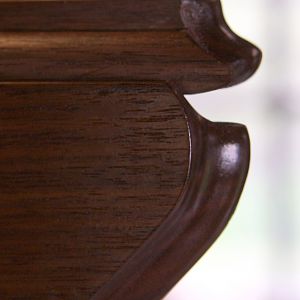
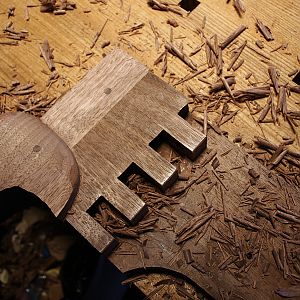
edge detail dropleaf corner
Profile of rule joint and edge profile with joint open.- Charlie Buchanan
- Media item
- card dropleaf handkerchief table
- Comments: 0
- Album: Dropleaf card table
-
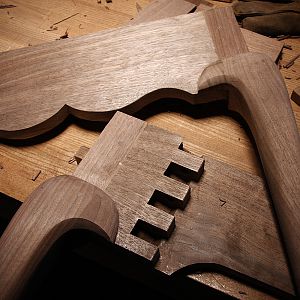
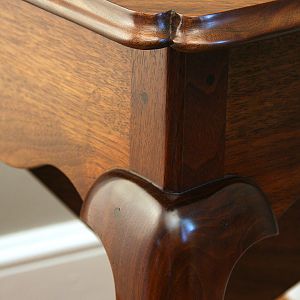
Kneeblock shaping
The swinging leg kneeblock and the hinge apron kneeblock are shaped and ready for scraping and sanding.- Charlie Buchanan
- Media item
- cabriole card dropleaf kneeblock leg table
- Comments: 0
- Album: Dropleaf card table
-
Kneeblock shaping
Kneeblock is partially shaped using paring chisels and low angle block plane across the grain. Next is the rasp to shape the concave bottom of the curve.- Charlie Buchanan
- Media item
- cabriole card dropleaf kneeblock leg table
- Comments: 0
- Album: Dropleaf card table
-
Kneeblock shaping
Hinge apron kneeblock is shaped and ready for scraping and sanding.- Charlie Buchanan
- Media item
- cabriole card dropleaf kneeblock leg table
- Comments: 0
- Album: Dropleaf card table
-
Kneeblock shaping
Kneeblock is rough cut and glued in place.- Charlie Buchanan
- Media item
- cabriole card dropleaf kneeblock leg table
- Comments: 0
- Album: Dropleaf card table
-
Legs rightside up
Checking for symmetry among the four legs which are still square at this point.- Charlie Buchanan
- Media item
- cabriole dropleaf leg table
- Comments: 0
- Album: Dropleaf card table
-
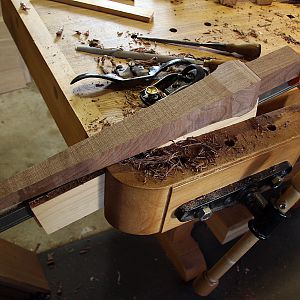
shaping the legs
After sawing out the profiles I clamp the legs in vise to flatten and fair the faces with block plane, rasp and spokeshave. Once the faces are fair and still square the corners are worked toward round.- Charlie Buchanan
- Media item
- cabriole dropleaf leg table
- Comments: 0
- Album: Dropleaf card table
-
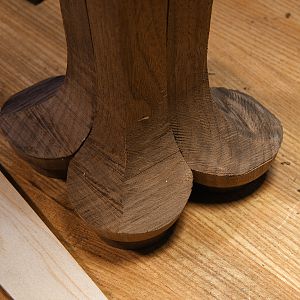
cabriole legs feet
Here is a photo of the feet standing on the bench. They are still rough but one is a little fatter at the ankle so that needs work as well.- Charlie Buchanan
- Media item
- cabriole dropleaf leg table
- Comments: 0
- Album: Dropleaf card table
-
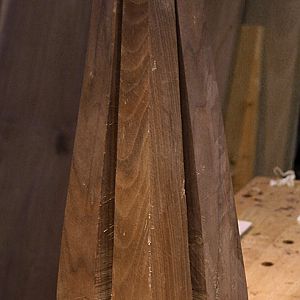
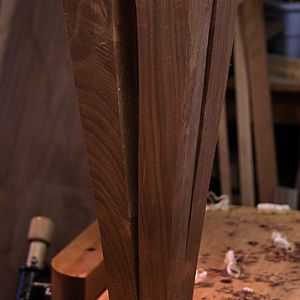
cabriole legs
The set of legs sits upside down on the bench so I can see if they are closely matching enough at this stage. They have been sawn out and the faces flattened and faired. Next phase is to round the corners until the legs are round at the ankles.- Charlie Buchanan
- Media item
- cabriole dropleaf leg table
- Comments: 0
- Album: Dropleaf card table
-

Turned foot pads
After marking out the pattern for the legs I turned the pads and bottom of foot. The pads are left long and will be cut later to eliminate the lathe drive marks.- Charlie Buchanan
- Media item
- cabriole card dropleaf leg table
- Comments: 0
- Album: Dropleaf card table
Premier Sponsor
Our Sponsors
LATEST FOR SALE LISTINGS
-
-
-
 SOLD -- $75: Gast moa v113 Vacuum Pump Veneer, 60" bag and board
- Started by peterdnight
- Replies: 1
-
GONE: Gladiator 5 cleats, 10 hangers, Paper Towel and Shelf
- Started by peterdnight
- Replies: 3
-
SOLD -- $100 Makita mac700 portable air + grex pin nailer + 2 others + 50' hose
- Started by peterdnight
- Replies: 1