That's a really nice restoration.
Keep the old fence, since there are times when a low fence is very beneficial. Clean up the original fence, fill the gouges with Bondo or whatever it takes to make it straight and with smooth surfaces again. There are times when you will thank me for this. I swap my fence
frequently, depending on which fence will do the job best.
Your next upgrade should be a Digital Fence Readout. I have a Wixey on mine, and I purchased an additional readout strip and extrusion so it covers the entire length of the fence rail. I bought this extra piece so I could use the fence on either side of the blade and also to keep the DRO module from falling to the floor if I slid the fence over the blade slot and to the far left of the blade. The Wixey package only contains enough rail and readout strip for the right side of the blade movements. I can set the fence at 1.00" and cut a board, then move the fence away and make several other cuts, then move the fence back to 1.00" and make another cut. When I measure both 1" pieces with a digital caliper, they will be within .005" of each other in cut width. I don't need better than that. The Wixey DRO makes it easy to do incremental cuts too, and switches back and forth from metric to imperial with one button. To mount the readout, I cut short pieces of 1/2 sq. steel tubing and drilled 3 holes in each. Two holes let me attach the tubing to the bottom of the Unifence rail so it cantilevered out in front of the rail. I then attached the Wixey extrusions to these (upside down) so the extrusion was on top of the 1/2" sq tubing. Then I installed the readout strips right side up into the extrusions. This positioned the extrusions low enough not to interfere with the fence movement, but positioned so that I could attach pieces of the magnetic target to each side of the Unifence casting to achieve a magnetic link to the Wixey DRO. This lets me use the DRO module on either side of the fence extrusion.
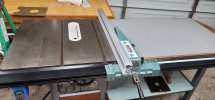
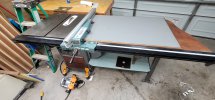
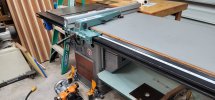
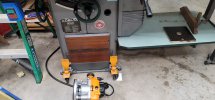
I've taken pics of all this and will post them after I can get them from the phone to the PC.
The other great option that I added to my Unisaw is a laser line generator that displays a red line across the top of the saw to show the cut line on any work that I'm doing. This laser unit is mounted to the ceiling directly above my saw and I can turn it on and off via a single button remote that I Velcro attached to the top of the Unifence Casting. Although it does help some to help me guide long pieces when rip sawing them, my primary use of it is to remind me not to put my fingers in the cut line. If my fingers ever have a red line on them, they are in the wrong place. This is especially helpful when doing blind cuts where you can't see the blade, like when doing dado cuts - if the wood has a thin spot or the saw setting changes, I don't want my fingers anywhere near where the blade breaks through the surface. This laser line keeps my fingers away, even when I can't see the blade. I bought this laser system from Woodline in Tennessee some years ago. They don't list them as available in their catalog any more, but a call might find out that they still have a few left. It comes with the laser unit with space for batteries, plus a "wall wort" power supply to use in place of batteries, and the little single button remote to turn the laser on and off. The laser head is adjustable to get it parallel and above the blade and positioned so that the line extends well forward and behind the saw.
I have owned many table saws in my life, some even new, but I was always searching for a "Better Saw". After getting and cleaning up my mid 80's Unisaw I have stopped searching. One of my children will inherit my Unisaw, and it will likely last their lifetime too, or until a better way of cutting wood accurately comes along.
Charley

")