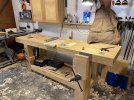
April Contest

Dee2

Board of Directors, Vice President
Gene
Staff member
Corporate Member
This one has got to be good!

This month's contest is for stationary shop benches and/or jigs, must be 80% scratch built, not a kit build (sorry). If you've built one, time to show it off. I'm widening up the "completed within" window (84 months) because I don't expect there are too many here that mass produce shop benches/jigs. PM me if you think that is still too narrow. The only kits permitted are cut-to-fit kits. Time's a wastin!.

Rules:
- Must be created/completed within the last 84 months - here's a reason to sell the old and build the new.
- 80% wood.
- One submission per creator/artist per category (month).
- Each creator can win a contest no more than once every six months.
- Members vote for winners so your submittal 'marketing' post should reflect quality. Limited to 3 photos and 500 words. One post per submittal. Any Q&A regarding a submittal should be handled by separate post or DM, PM, or Start Conversation. I like the separate post because it doesn't clutter the contest thread, maybe preclude votes being biased, and everyone can share How's It Made with the forum.
- In case of a tie, a judge panel will make the selection. Judges decision is final. Judges will remain anonymous.
- Each monthly contest will have two winners, novice and journeyman/veteran/pro. Novice is defined as <3 years woodworking, cumulative. Journeyman is all others. Submitters must indicate if they are novice or journeymen; honor system applies. If you don't indicate as novice or experienced, you will be considered experienced.
 
Last edited:

creasman

Jim
Staff member
Corporate Member
I guess someone has to start off this month's entries, so here goes (journeyman/veteran/pro category)...

Drill Press Table with Fence

I purchased a used Delta drill press and decided to make a decent table for woodworking with these goals in mind:
  • Table large enough to support the work (about 30" x 28" in my case).
  • T-tracks for holding awkward pieces.
  • Fence that is easily adjusted and/or removed as necessary.
  • All adjustments on the front -- no reaching around or under the table.
  • Decent dust collection.
After looking at various plans and options I came up with a design. This is the final result, completed in 2022.

1712489395636.png


The table is covered in laminate. A half-inch MDF insert is used as a sacrificial plate. There are two T-tracks embedded in the top. The left wheel controls the height adjustment lock, the middle crank raises or lowers the table height, and the right wheel moves the fence forward or back. I had room in the middle for a small drawer to hold the chuck key and a few other items.

The fence is held in place by a single bolt (knob in the back of photo) with two alignment pins to keep it square in the movable plate embedded into the table. A dust collection hose attaches to the shoot. The guide stops slide in the top T-track. Each has a micro-adjustment rod and flips up and back when not in use. The faces of the fence slide open to accommodate different bit diameters.

1712489605422.png


These are the table parts (pre-assembly), most of which are out of sight under the table. You can read more about the project here if you like.

1712490057177.png
 

Mark Johnson

Mark
Corporate Member
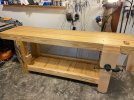
This ash workbench, made a couple of years ago, is a compilation of a number of different designs found on line and set to match the height and dimensions that I wanted. Both vises started with only the vise screw, all other parts I made. I used some of pop pops designs for the leg vise, and just looked at pictures of other tail vises to come up with this design. Both stringing and inlay (the inlay itself was purchased) on the leg vise were just an excuse to learn how to do both techniques. Vise handles are turned bubinga that I had in the shop from other projects. The last comment is that the keyhole arches are there because I like the architectural feature and as a "nod" to Morocco where I was born.
IMG_0250.JPG
IMG_0251.JPG
IMG_0252.JPG
 

pop-pop

Man with many vises
Corporate Member
My entry is this Husky benchtop bench
IMG_5117.jpeg


This project started with the gift of an 18” vise screw from @J_Graham who requested that I make something for someone. I wanted to test the notion of resisting the tilting of a chop while clamping against bottom of the benchtop.
That notion was implemented thusly (note that the bench is inverted):
IMG_5081.jpeg

A brass toilet bolt rides in the blue t-track to keep the brace arm from sagging when the vise is open.
IMG_5137.jpeg


By bracing the chop under the screw, there are no guide rods in your way as with conventional face vises.
IMG_5123.jpeg


Another feature is a ball-bearing spinner added to a short Tommy bar as the vise screw handl.
IMG_5116.jpeg


The “someone“ ended up being the NCWW Outreach trailer that I donated this bench to.
 

tghsmith

tghs
User
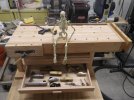
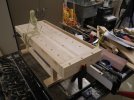
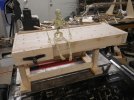
here is my small entry, a benchtop bench for model work, 1/3 scale, all made from recycled hard maple,, Lee Valley vise hardware,, the bench-dogs are 1/4" turned down brass bolts,, small drawer unit was an artist tool holder that just happened to fit well.. the bench has been getting lots of use!!!
 

Attachments

  • ben2.JPG
    ben2.JPG
    244.1 KB · Views: 37
  • bench8.JPG
    bench8.JPG
    257.7 KB · Views: 34
  • bench9.JPG
    bench9.JPG
    240.8 KB · Views: 34

Dee2

Board of Directors, Vice President
Gene
Staff member
Corporate Member
Time to...bump. There has to be more workbenches. Can't be that many, who like me, are still using saw horses. Post 'em up, please.
 

Mike Davis

Mike
Corporate Member
This ash workbench, made a couple of years ago, is a compilation of a number of different designs found on line and set to match the height and dimensions that I wanted. Both vises started with only the vise screw, all other parts I made. I used some of pop pops designs for the leg vise, and just looked at pictures of other tail vises to come up with this design. Both stringing and inlay (the inlay itself was purchased) on the leg vise were just an excuse to learn how to do both techniques. Vise handles are turned bubinga that I had in the shop from other projects. The last comment is that the keyhole arches are there because I like the architectural feature and as a "nod" to Morocco where I was born.
View attachment 228023View attachment 228024View attachment 228025
This is going to be hard to beat.
 

Dee2

Board of Directors, Vice President
Gene
Staff member
Corporate Member
But not unbeatable, IMHO.

I would like to encourage anyone who has built a bench/jig within the last 7 years to show off your creation. Your submittal may encourage (at least me) and others to get busy building their own, even if it is a C. Schwarz design from SYP. I need inspiration because I've got a really nice vise I bought from a member at the picnic last year. Let's see those workbenches/jigs!
 

Premier Sponsor

Our Sponsors

LATEST FOR SALE LISTINGS

Top