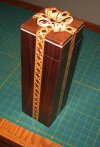
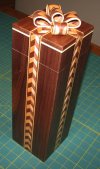
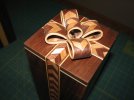
Of course, the bow makes the box pop. My daughters (both wine drinkers) will go nuts over these!
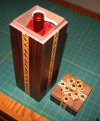
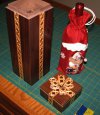
The bow parts appear to be bent, but they would never hold together if they were. They are cut with a scroll saw from the same kind of "Loaf" from which the inlay bandings are sliced, so they are a match (see picture below). Other than making the loaf, the difficult part is sanding the bows without breaking them. In this case I used a dremel tool with a leaf sandpaper thingy. As you can imagine, they are pretty fragile. I broke a couple until I got the hang of it. But once they are cut and glued (epoxy) to the top, they are not as fragile as one would imagine. I finished the bow parts before attaching to the top. To keep them from flying around while spraying, I double-taped them to a scrap of plywood. It was a fun project, but so time consuming. Thanks for the positive feedback guys...
View attachment 186217