Making Colonial Shutters

Status
Not open for further replies.

mgoins

Marvin
Senior User
3/26/2011 - Not much progress to speak of, am bumping it to keep hope alive... The last few weekends have not been conducive to shop time. Am shooting to test fit them in the window today. Will post pics later. Thanks.
 

MarkE

Mark
Corporate Member
I'm beginning to understand why these shutters are so expensive to buy. You have been putting in a tremendous amount of work on this project. Your craftsmanship really shows. :thumbs_up :thumbs_up
 

mgoins

Marvin
Senior User
I'm beginning to understand why these shutters are so expensive to buy. You have been putting in a tremendous amount of work on this project. Your craftsmanship really shows. :thumbs_up :thumbs_up

Thanks, Mark.

Regarding being 'expensive', I agree. It takes a lot of machines and jigs to make this work. However, from a skill perspective, I can't put a value on what's been learned. Prior to this project, most of what i'd done in the shop related to house restoration, or building, what I'd call 'house parts' - built-ins, moldings, baseboards, panelling, & such, and the finish carpentry to install it.

The nature of the shutter project, with added pressure of a limited amount of wood, raised the bar an order of magnitude, forcing fine-tuned tools, jigs, and setup to yield precision, not once or twice, but 200 times in the case of the shutter blades, and 400 times in the case of drilling pin holes in the blades & rails. There are literally 1000 opportunities to ruin the entire project, some of which may be realized til installation.

We'll talk to you later...
 

mgoins

Marvin
Senior User
3/27/2011 - The last several weekends have not been conducive to working in the shop. Got a chance yesterday to make some progress on the project. First by test fitting the empty frames in the window opening & trimming somewhat to fit. Then on to dry assembly of everything, and another test fit. The eagle eyes among you will notice that the panels overlap a little in the middle. The overlap (~3/16') occurred with installation of the blades, with most going away with glue-up, and the rest (1/8") trimmed out - that remains to be seen.

Here's a pic of them in the window - dry fit.
ShuttersTestFitinWindow.jpg


Next step is glue up... May be able to get to that today. We'll see...

Til then...
 

mgoins

Marvin
Senior User
12/10/2011 update – Okay, so this is bad… Looking thru this thread, I realized this project has taken nearly a year to complete. So, our goal here, is to complete this project in under a year, hopefully before Christmas. Taking holidays into account, there’s 15 days remaining…

Last update was in March, just prior to an assignment change at work, which made shop time a thing of the past. Shop time from March til early October involved an occasional ‘open the door & ‘sniff’’, …

Tripping across a 24” Delta scroll saw back in October really got me motivated to get the shutter project completed.

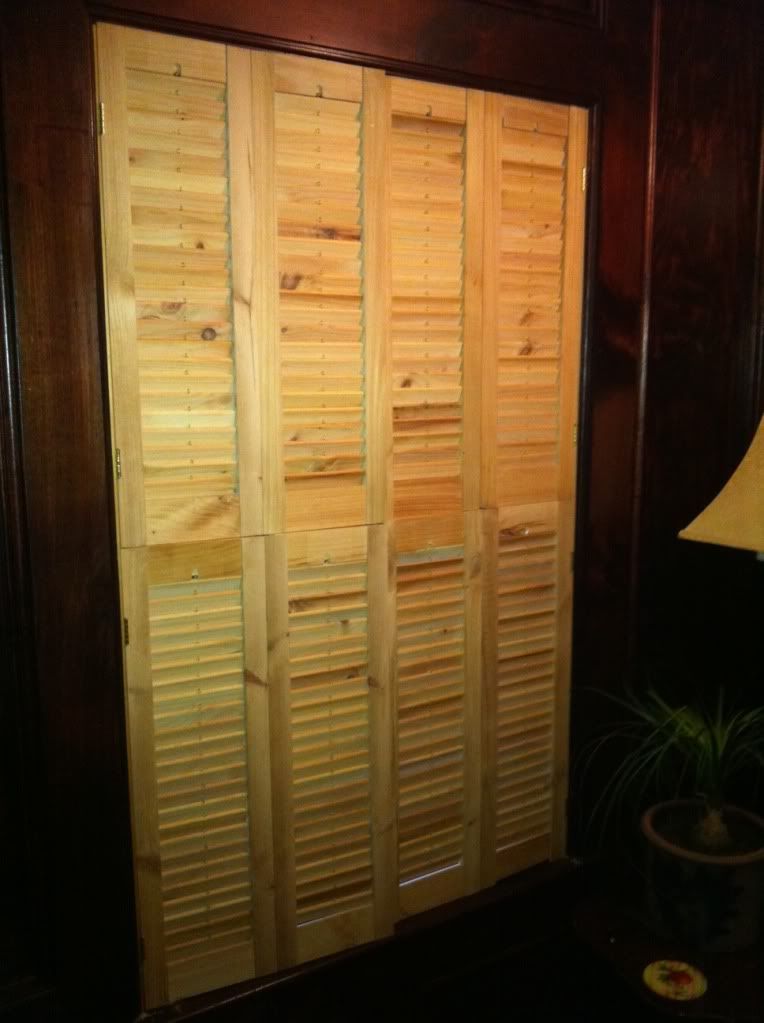
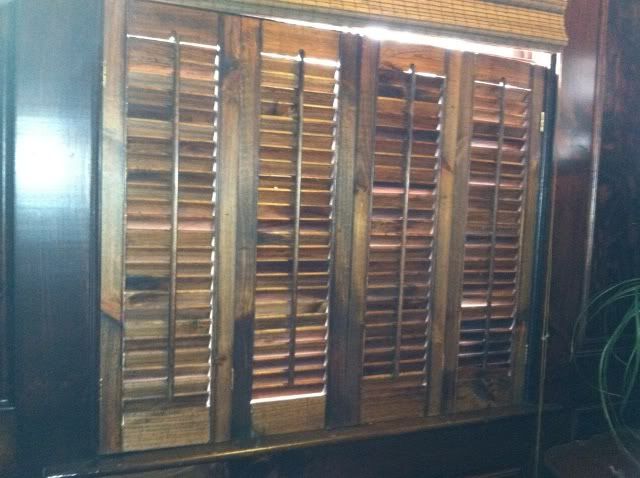
When we left off in March, we had a successful dry fit in the window. After that the shutters were broken down into component parts again awaiting stain, and left until a couple weeks ago.

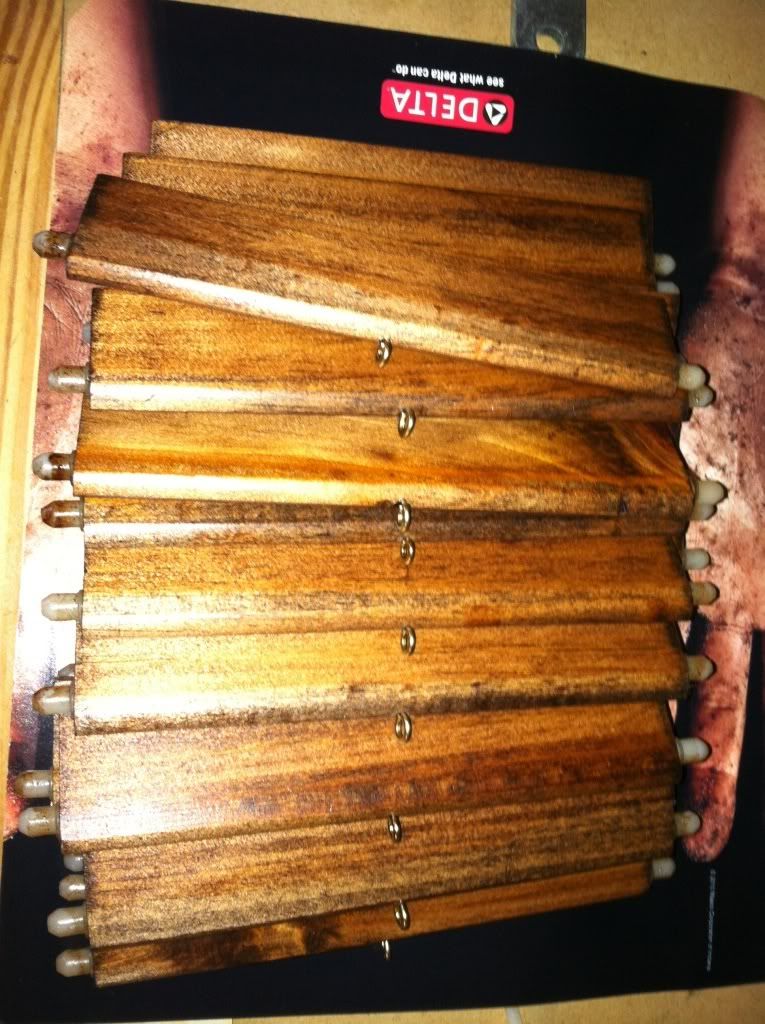
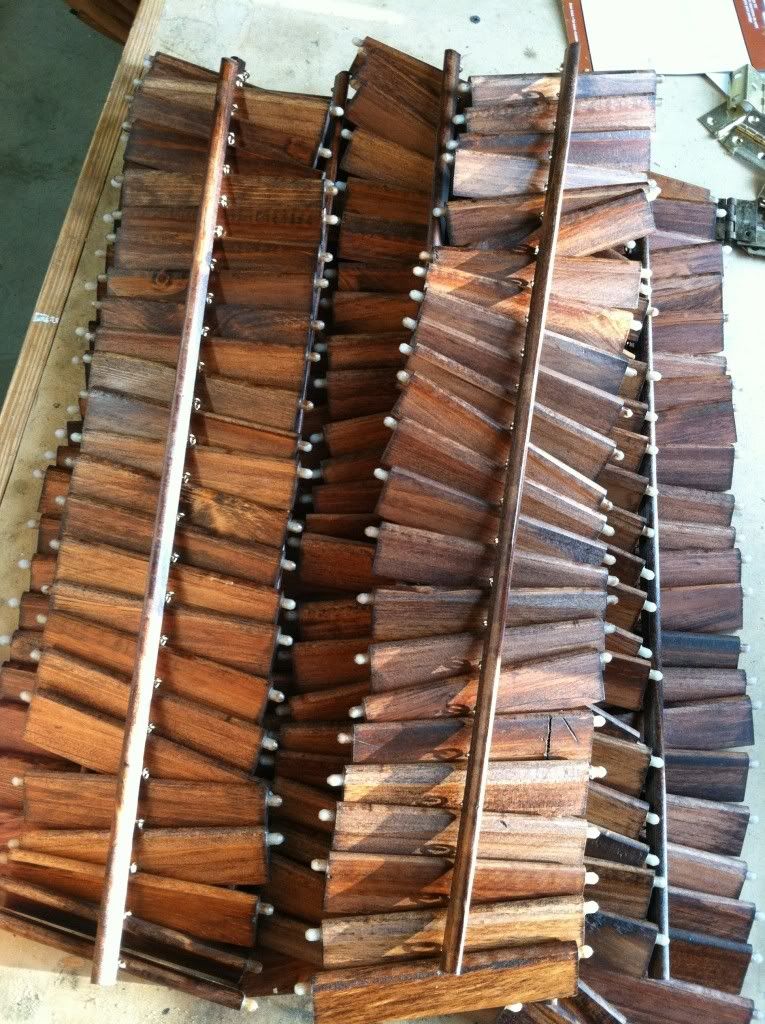
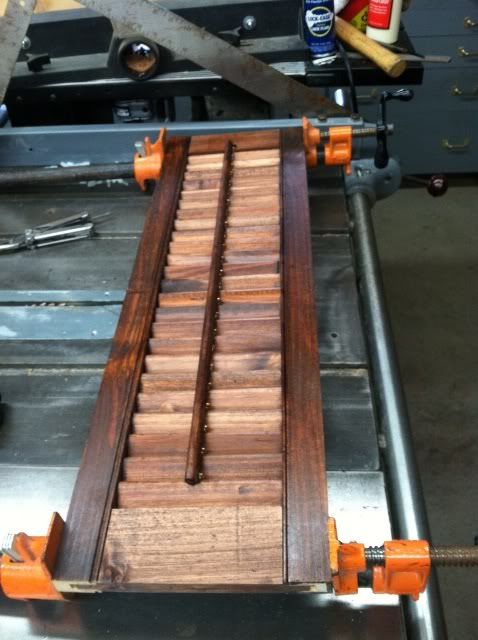
Staining was a slow, tedious process and took nearly 8 hours to complete. The slats below are stained ready for polyurethane:
IMG_0118.jpg


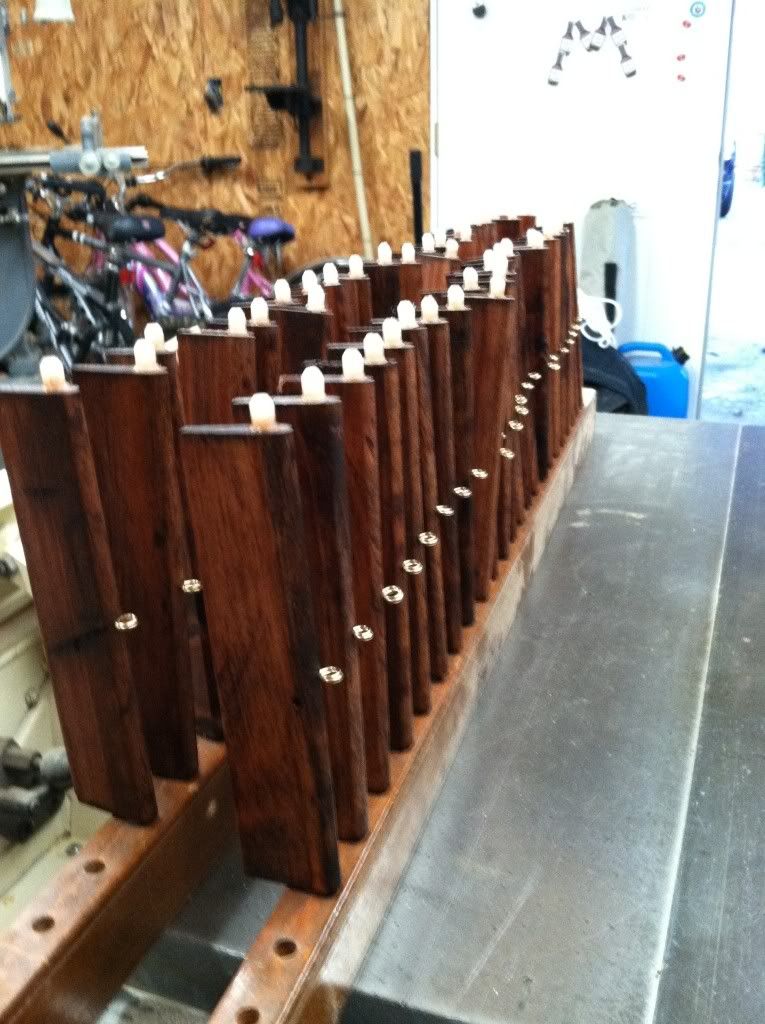
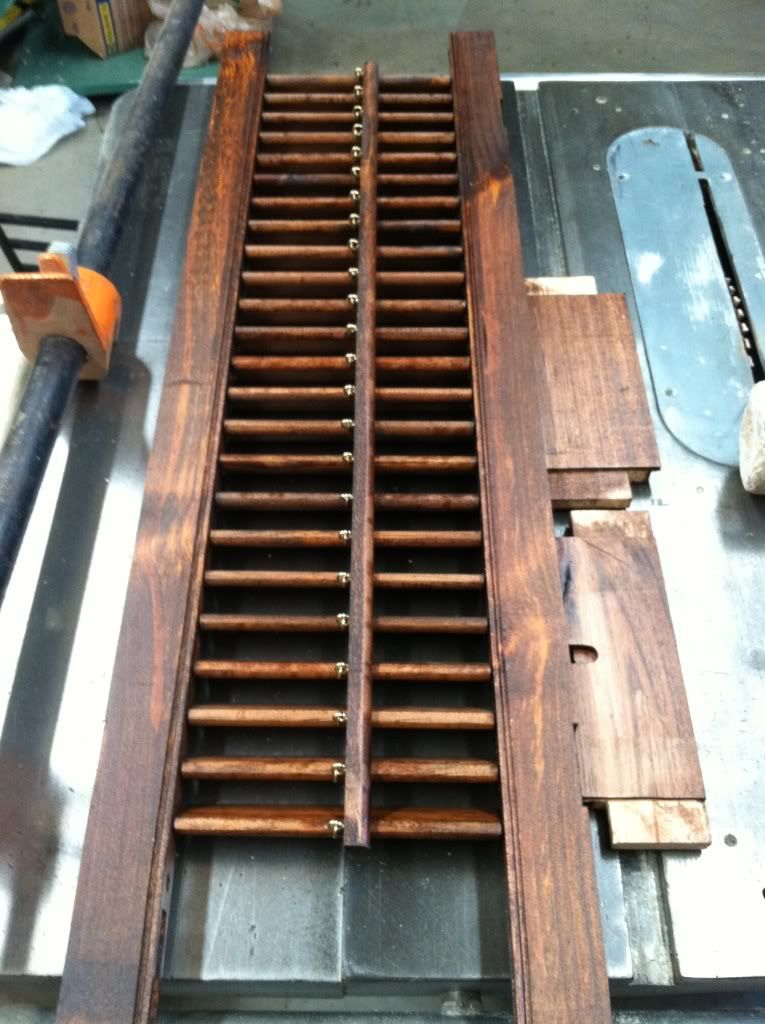
Polyurethane was completed last weekend - 12/3/2011. Slats below are drying in the rack.
IMG_0121.jpg


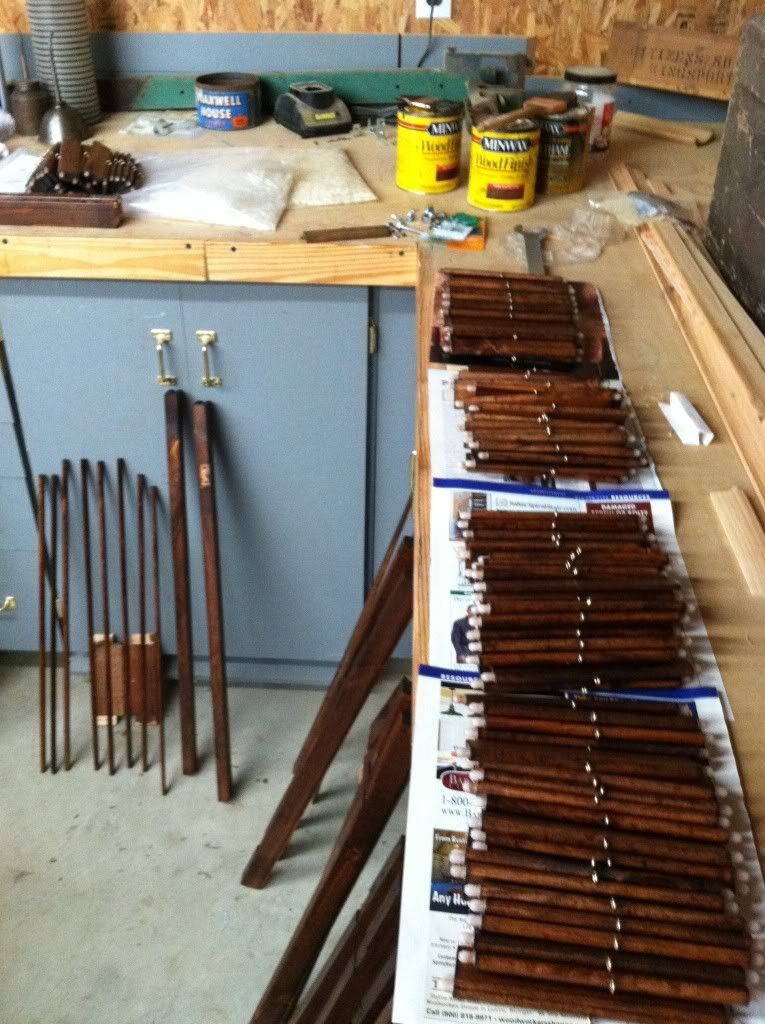
Polyurethane complete.
IMG_0120.jpg


“Time for a little assem-bell-y”… Slat assemblies completed.
IMG_0122.jpg


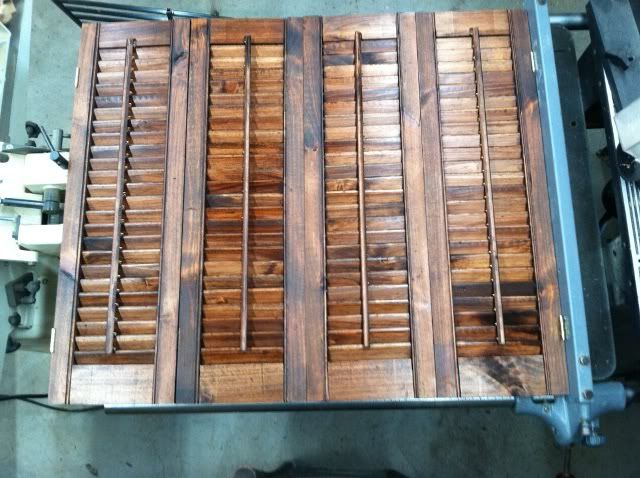
First dry-fit since stain & polyurethane. Checking that the slats can still move freely.
IMG_0123.jpg


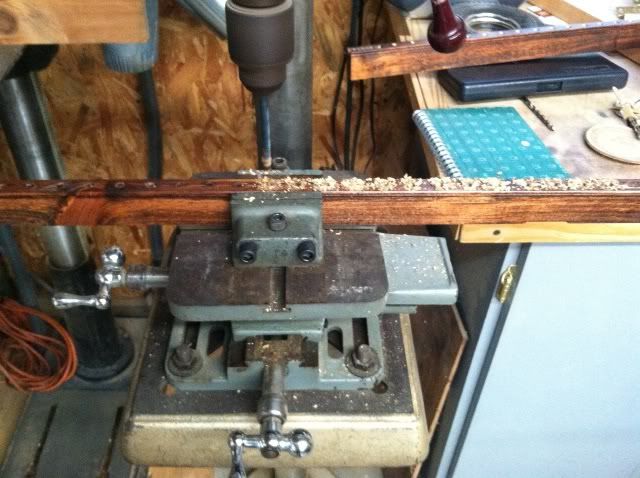
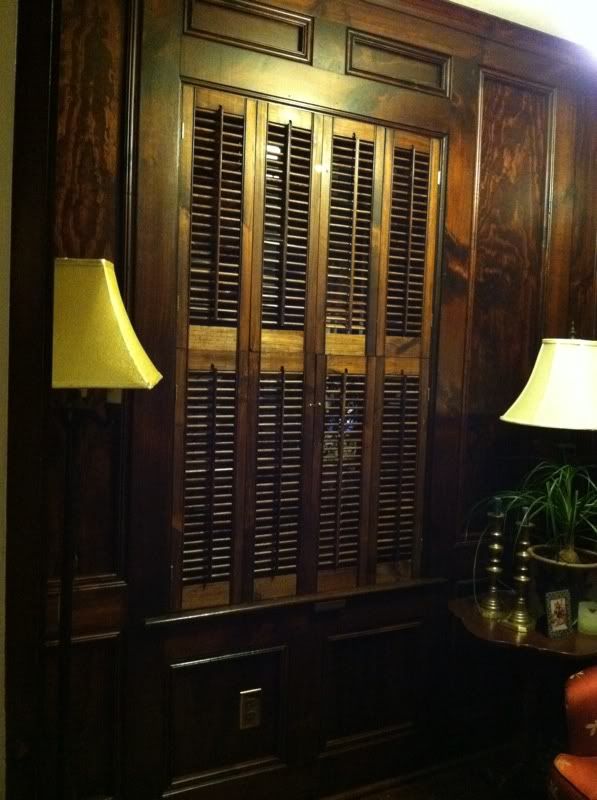
Dry Fit showed that the tolerances between shutter pins, and holes in the stiles were too tight. Moving each one by hand individually was easy, but by adjustment rod, not so… Redrilling the holes to clean out stain & poly helped somewhat, but, it’s still not what they need. Had to quit to head to the store for drill bits missing from the collection. Enlarging the holes to allow easier movement is today’s exercise. Hopefully, we can begin the glue-up as well.

‘til later…
 

mgoins

Marvin
Senior User
12/11/2011 Update: Got up early this morning, 6am, and headed out in the shop, and was greeted w/19 degree temps, is the first really cold day we've seen. Whew. Turned on the heater for a few minutes, and glue'ed up section 2. Just got back in the house, and thought i'd update the post with yesterday's progress.

Redrilled all the holes to 9/32" for the shutter pins in the stiles to allow easier movement of the shutter slats.
IMG_0126.jpg


Once that was done, did a quick dry fit of the lower section of shutters.
IMG_0130.jpg


Followed by a test fit in the window. Couldn't have asked for much better.
IMG_0131.jpg


Committed! Here's section #1 in glue-up.
IMG_0132.jpg


I admit to being clamp poor, having only 3 Pony pipe clamps. So, i can only do a section at a time right now. Just never needed more than that before... But, that's the purpose of projects, right - To accumulate more tools? Time to head to the hardware store...
 

Gotcha6

Dennis
Staff member
Corporate Member
Looking good. :icon_thum In the absence of clamps, a clamping jig using cleats and wedges should do just fine. You could even make one using a few tee nuts and bolts for multiple glue ups of the same product. Remember, "Necessity is the mother of invention, but poverty is the father."
 

mgoins

Marvin
Senior User
12/11/2011 - evening update: Got quite a bit done today - 4 panels glued up, totalling 5 so far. Hopefully, we'll have them in the window by the end of the week.

Comparison of first completed shutter vs. the Vintage...
IMG_0133.jpg


Getting there!
 

mgoins

Marvin
Senior User
Re: Making Colonial Shutters - FINISHED!

12/17/2011 update: Last challenge to overcome prior to installation was changing out burglar alarm sensors to sllow the shutters to close completely. That had to be coordinated with the alarm company. Once that was done, it was downhill from there.

Here they are complete & installed in the Reading Room!
dc8de7fc.jpg


Am glad to have this one done. No doubt, I've learned more on this project than any other. Given the scarcity of the wood, the pressure to not screw this up was intense, while the opportunities to do so seemed endless. Thanks to all of you who played along, and offered encouragement.

With that, one thing remains to finish up the room completely, an HVAC vent. Fortunately, I have a few extra louvers, and just enough wood for it. Am heading out to the shop to work on that now. Hopefully, it'll be ready for glue-up today.
 
Status
Not open for further replies.

Premier Sponsor

Our Sponsors

LATEST FOR SALE LISTINGS

Top