INCRA Router Table Cabinet

Status
Not open for further replies.

copythat

New User
Rob
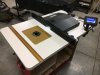
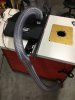
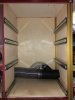
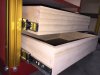
I bought an INCRA router top and stand last year when I got back into woodworking. I recently decided to built a cabinet for it using INCRA’s free plans located here: https://www.incrementaltools.com/Free_Plan_s/149.htm#guycabinet

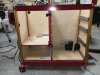
The project is moving along and should be done this weekend . . . if I can just get time in the shop!


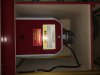
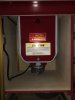
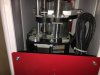
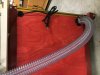
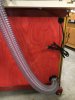
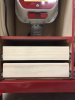
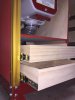
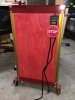
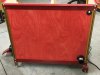
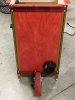
I don’t think my wife liked the red stain finish I went with. I thought it looked pretty cool; I guess it’s the “Craftsman” fan in me that likes the red color.

attachment.php
attachment.php
attachment.php
attachment.php
 

Attachments

  • IMG_0337.jpg
    IMG_0337.jpg
    293.4 KB · Views: 998
  • IMG_6632.JPG
    IMG_6632.JPG
    521.4 KB · Views: 424
  • IMG_1708.jpg
    IMG_1708.jpg
    281.7 KB · Views: 435
  • IMG_6892.JPG
    IMG_6892.JPG
    484.4 KB · Views: 438

Bill Clemmons

Bill
Corporate Member
Looks like a nice, well built cabinet. I like the darker red better. Maybe a second coat on the plywood parts. :)
 

Bear Republic

Steve
Corporate Member
Looks great! You did a really nice job. I like the red also. One question though, is there a reason for the ducting to go out the right side and not the left side directly under the router?
 

copythat

New User
Rob
Looks great! You did a really nice job. I like the red also. One question though, is there a reason for the ducting to go out the right side and not the left side directly under the router?

I believe it was designed that way so the Y-connector was concealed within the cabinet, behind a 10" drawer. I wish I hadn't followed the directions exactly because I would have put the small port in the back more toward the center.

There was also one design flaw I found that dealt with the bottom panel. The designer cut it to fit only on the edges of the left and right side bottom supports. The plans called for no support anywhere in the middle and everything rides on the middle upright. I ended up putting a solid piece of stock underneath the frame, across the middle (front to back), for support and used the existing holes in the frame to secure it in place. It took out the sag and tightened everything up.
 

sawman101

Bruce Swanson
Corporate Member
Not just a router table cabinet, but a beautiful piece of furniture Rob! Nice work!
 

copythat

New User
Rob
It is getting closer to completion. Funny how I have to finish it to a certain extent so I can make the dovetail drawers.

I outfitted it with a Ready-2-Route lift and fence.

attachment.php


I also installed an INCRA Cleansweep. The 4"hose and bottom of the enclosure makes for a tight fit. If I were to do it again, I would drop the enclosure down a tad and go with one drawer below the enclosure instead of two.

attachment.php


The Ready-2-Lift fits fine in the Cleansweep. I have a one foot, 12 AWG cord permanently installed in the Cleansweep so I can lift out the router and use it elsewhere if need be.
attachment.php


Bear Republic asked about the ducting and I thought these might be better shots to help explain it. I think the designer's entire purpose was to hide the Y connector inside the cabinet. However, that leaves a 4" connection going out the right side and a 2" out the back going to the fence. I guess it looks ok.

attachment.php
attachment.php

attachment.php


The back is sort of a mess with the power cord, computer cable, and 2" ducting.
attachment.php
attachment.php
 

Attachments

  • IMG_9589.jpg
    IMG_9589.jpg
    289.9 KB · Views: 277
  • IMG_9607.jpg
    IMG_9607.jpg
    175.7 KB · Views: 177
  • IMG_9607.JPG
    IMG_9607.JPG
    231 KB · Views: 277
  • IMG_1876.jpg
    IMG_1876.jpg
    239.6 KB · Views: 254
  • IMG_6331.jpg
    IMG_6331.jpg
    262.9 KB · Views: 281
  • IMG_0724.jpg
    IMG_0724.jpg
    298.9 KB · Views: 280
  • IMG_5441.jpg
    IMG_5441.jpg
    262 KB · Views: 168
  • IMG_9492.jpg
    IMG_9492.jpg
    311.6 KB · Views: 180
  • IMG_9492.JPG
    IMG_9492.JPG
    658.3 KB · Views: 266
  • IMG_3445.JPG
    IMG_3445.JPG
    733.4 KB · Views: 269
  • IMG_5441.JPG
    IMG_5441.JPG
    700.1 KB · Views: 286

Bear Republic

Steve
Corporate Member
Nice catch on the center support! I understand it better with the new pics thanks. The hoses and port look like it they really could be designed better. With the equipment on the cabinet really make your work shine.
 

copythat

New User
Rob
I finally made it back into the shop. I set up my INCRA Ultra and retrained myself on the fine art of dovetail joints. I had a good dovetail joint in about 20 minutes. I then planed some wood, cut the drawer pieces, and slowly got busy. They are my first attempts at dovetails in over 13 years and it was fun to be back at it.
attachment.php

attachment.php

attachment.php
 

Attachments

  • IMG_0385.JPG
    IMG_0385.JPG
    85.6 KB · Views: 193
  • IMG_0390.JPG
    IMG_0390.JPG
    118 KB · Views: 197
  • IMG_0393.JPG
    IMG_0393.JPG
    128.4 KB · Views: 205
Status
Not open for further replies.

Premier Sponsor

Our Sponsors

Top