I love the smell of Danish oil or my new workbench

Status
Not open for further replies.

BarryC

New User
Barry
Finally I go busy and finished my new work bench and took some pics. I know there are things that I learned and mistakes I made on this one that hopefully I can correct on the next one. The idea for the top came from Bas and I used 2x4's jointed and glued together. It probably wasn't necessary but I did use 4 biscuits on the middle pieces and 7 on the ends.

tn_DSCF0079.jpg

tn_DSCF0080.jpg

tn_DSCF0081.jpg


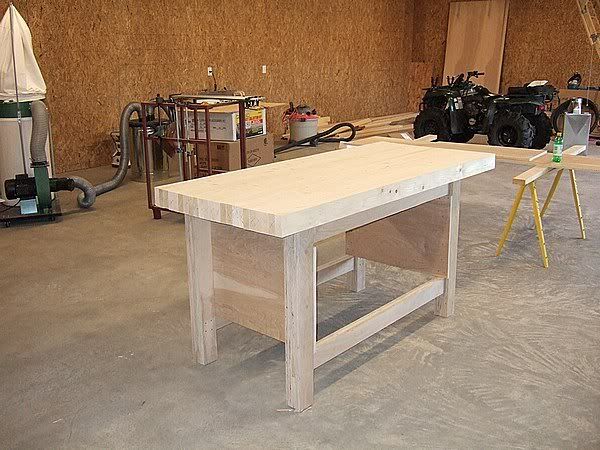
The main thing I learned was to glue up the top like it will lay on the bench. I had a bright idea and turned them upside down for the glue up in hopes that I would have a more even top and wouldn't have so much sanding to do to make it smooth. Well that didn't work so good! I think it might have worked OK had I had the right clamps like the big money Besseys but instead I used my half dozen $4 36" Harbor Freight specials and it allowed the top to cup and while the bottom lined up wonderfully with nice tight joints the top had a few problems with gaps.

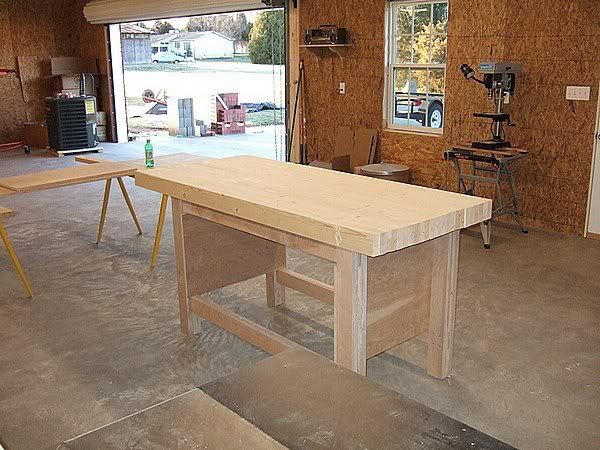
The base was build using 3/4" plywood laminated together. The plan I would have to search for since I'm at home and they are booked marked at work but I'm too tired and lazy at the moment. Even with my limited woodworking knowledge I managed to make the base straight and level (until I clamped the top on and screwed it down...thank God for shims) and square.

All in all the base I am proud of the top not so much. I can always build a new top after I acquire a little more skill and the right clamps (oh, honey I need to buy a few more tools.....).

Thanks for playing along!!
 

NCPete

New User
Pete Davio
barry, that looks like one sturdy bench! you may find that using some handplanes to flatten the top will bring it back in line nicely - course someone else will have to tell you that process!
 

woodArtz

New User
Bob
Great looking bench Barry! That shop is huge! You'll need to make two or three more of those to start filling it up :lol:.
 

Travis Porter

Travis
Corporate Member
It looks good to me! One thing that helps on glue ups is putting clamps on the top and the bottom and using a straight edge and adjusting the tension on the clamps.

Still, I think you did a fine job. I had never thought of using plywood for the base like that. Makes a lot of sense to me.
 

RandyJ

Randy
Corporate Member
Nice bench, Barry! Should smooth up nicely.
I agree, there's way too much vacant space in that shop. I'd get lost in there. Either get busy buying or building!!!
 

sapwood

New User
Roger
Now, that's a solid workbench! And you've slipped in a stealth gloat with the workshop . . . sooo much space and some nice looking power tools :eusa_danc

Great shop Barry :icon_thum
Roger
 

Bas

Recovering tool addict
Bas
Corporate Member
Barry, as the self-proclaimed expert on 'workbenches with a 3" slab top made from construction lumber and glued together with Harbor Freight bar clamps', that is one FINE looking bench. The use of a sheet of plywood instead of a stretcher is brilliant. Instant storage space for tools. A few bench dog holes and you're in business!

As for the top being all smooth, well, that doesn't last long anyway. Before too long, it will have scratches, dings and a beauty mark or two where you misdrilled/ missawed. The trick is to make friends with someone with a wide belt sander, so that you can have it "freshed up" when it gets too much damage.

As everyone else has said, great looking shop. You're going to be busy for the next 2-3 years with shop projects - cabinets, more work space, lighting, dust collection, jigs, lumber storage....

Thanks for posting.
 

toolman

Administrator
Chad
Barry

Your work bench looks 100 times better than mine, I don't have one. Your work bench looks great to me, YOU SUCK. :gar-Bi I have some white maple that is drying for my work bench, I thank I will put a work bench together to learn as you did. Great work!
 

BarryC

New User
Barry
Thanks for the compliments. I think it will work well for the time being. The only hand tools I have is a very old Craftsman plane my grandfather gave me years ago. So far I have taken it out of the box a few times over the years to look at and fondle before wiping the finger prints off and putting it back.

I think the next thing I need or want to build is a big honking mutha of an assembly table. I think I have room for one so why not. In the pic you can see my first assembly table consisting of 2 cardboard boxes and a scrap piece of OSB. I will be sad to see that cardboard table go we've had such good times over the past 3 months. Guess I should be busy designing or looking at plans for a BHM assembly table.
 

Trent Mason

New User
Trent Mason
Barry,

That is a GREAT looking workbench and a NICE shop. 8-O Now, lets see some projects! :eusa_danc

Trent
 

BumoutBob

New User
Bob
What about screwing a piece of 1/8" masonite to the top. After it gets cut up, scratched, and paint bloched, you throw away the old piece and install a new one. Screw it on in a couple of places, and you're good to go.
 

BarryC

New User
Barry
Thats something I'll look into Bob. How flat you reckon the top aught to be before installing the masonite? I was building a smaller table for a new tool (gloat to come later) and found it to be pretty cupped in the middle. I didn't really measure it but if the 2x4s were straight there is a dip of about 3/8" in the middle.
 

NCPete

New User
Pete Davio
barry, my assembly table is a sheet of 3/4" ply on top of two sawhorses. being also the finishing table, I will have to flip it over sometime so the backside gets the same amount of sealer on it - right now, when the humidity changes, my assembly table changes shape!
 

BumoutBob

New User
Bob
3/8" dish seems to much. I'd recommend 1/16" or less. The purpose of a flat bench is to help you work on a fancy piece of expensive wood. Layout and measurement needs to be accurate. A dished top may let the fancy wood bend and lead to errors. Tools can roll around too. Sounds worth wile to sharpen up a hand plane or borrow one and get 'er flat. It's a great learning exercise anyway.
 

Gofor

Mark
Corporate Member
If you are not into hand planes, a belt sander would be a good tool to use.

Go
 
Status
Not open for further replies.

Premier Sponsor

Our Sponsors

Top