2 more WIP

Status
Not open for further replies.

CrealBilly

New User
Jeff
I ordered bridges but according to USPS track and confirm they keep bouncing from Greenville to Raleigh and back again :) Once the bridges come in I can determine the required neck tilt, and string spacing, glue the wings on and continue making more shavings, chips and dust... Still a ways to go before they are finished. But you know no pics didn't happen :)

The first one is a 1 5/8" thick solid body maple and steamed walnut, the neck will be bound in black. The second one is 1 1/4" thick semi hollow body air dried black walnut, the neck on it will be bound in cream.

12-10-08_11-47-07_222.jpg

2012-10-08_12-05-03_492.jpg
 

CrealBilly

New User
Jeff
Thanks Fred means a lot coming from a craftsman like you. I must admit I can see a lot better in the shop now that I got a
ML.JPG
 

Attachments

  • ML.JPG
    0 bytes · Views: 610
Last edited:

FredP

Fred
Corporate Member
:D wood you like to supersize that? Our new supersized model comes with a collar bracket to help hold ur head up.:gar-La;
 

CrealBilly

New User
Jeff
very cool. love the different colors of the walnut on the second one.

Yeah so do I... this is some 8/4 cull walnut that no body wanted from when I was milling and selling lumber several years ago. So I just brought it home and stacked in my drying shed, when I got ready to use it put it in my small little humidification kiln, and sterilized it in a old electric oven. My original thought was to plan all the sap wood off but after seeing it come off the first pass on the planer, I quickly changed my mind.

Funny... I guess, different strokes for different folks, The wife asked me what I did to that "poor wood" - it's all different kinds of colors, darker on the edges and lighter in the middle. I tried to explain to her about how some lumber has sap/heart wood, like walnut but I don't think she appreciated my reason for leaving it clear finished. Because, she then asked me if I was going to paint or STAIN it... I DON'T SATIN under any circumstance - no need!
 

CrealBilly

New User
Jeff
A few mile stones reached on the maple/walnut one

The neck is now bound and shaved, the wings are glued on, nut fitted, bridge routed in - I got to string it and it intonates fine. I still have some cleaning up at the heel where the wings join the neck (last picture) and of course there's lots of block sanding... but she'll be ready to have the fretboard radiused, fret markers and frets pretty soon.

2012-10-18_23-29-13_602.jpg

2012-10-18_23-29-43_622.jpg

2012-10-18_23-30-20_942.jpg
 
Last edited:

CrealBilly

New User
Jeff
Yeah the air dried walnut one is going to be pretty cool, has some nice wave... When I saw the curl, I just couldn't allow myself to plan it all way. Funny how no NCW'er wanted the 8/4 X 12" - 8' I recall being told "too much sapwood" by several members at one of the lumber runs. So I'll just turn that unwanted 8/4 X 12" - 8' into a bass guitar :) I kinda miss those lumer runs... It was Good Times...

Seal coat pic
2012-10-07_00-55-08_77.jpg
 
Last edited:

FredP

Fred
Corporate Member
Yeah the air dried walnut one is going to be pretty cool, has some nice wave... When I saw the curl, I just couldn't allow myself to plan it all way. Funny how no NCW'er wanted the 8/4 X 12" - 8' I recall being told "too much sapwood" by several members at one of the lumber runs. So I'll just turn that unwanted 8/4 X 12" - 8' into a bass guitar :) I kinda miss those lumer runs... It was Good Times...

Seal coat pic
2012-10-07_00-55-08_77.jpg

:eek: its only half finished!:eek:
 

CrealBilly

New User
Jeff
:eek: its only half finished!:eek:

Yeah only 1/2 finished, just a seal coat.

I finally got the Maple/Walnut one cleaned up and sanded enough for a seal coat, which means major wood working is over on that one :) I also radiused the fretboard to match the bridge (10 degrees) installed the fret markers and medium jumbo frets. I think it's starting to look more like a guitar now...

Couple more pics
2012-10-21_22-02-49_468.jpg


2012-10-21_22-03-39_755.jpg
 

CrealBilly

New User
Jeff
Thanks for the comments Travis and Wayne, encourages a guy to keep pressing forward... Being my first "new" fret job - I'm all full of what not to do's... But I must say I discovered something great to keep the frets in place. They sell a two pack like pictured at the dollar store for yep $1.00 plus tax. It's a lot better than even thick CA in my mind...

elitedeals_2233_26945644910.jpg


I spent quite a bit of time rocking, leveling, dressing and polishing frets. With the neck adjusted dead flat there is no buzz anywhere, even when string bending. A lot of work but well worth it because I own the smoothest playing bass yet. Next up is to rout in a pair of mini-humbucker pickups, pattern out the electronic box cover and some real minor rough spot body and neck scraping in preparation for finishing. Due to finances being low, I have to wait to order the rest of parts so it'll be sitting in a seal coat for a couple of weeks. The neck on the all walnut one should be done moving around by then and I'll start working on it.

Thanks again
 

CrealBilly

New User
Jeff
I was asked by a member to post a tutorial on binding with ABS so here goes... Pictures speak louder than words...

You'll need:

3M masking tape (not the thin cheap stuff)
Weldon 16
Binding color of your choice - here I'm using .060 x .375 ABS ivory colored
Flat needle file
super thin blade Japanese saw
Razor blades
Router @ template bushings
Chisels

B1.jpg


Apply enough Weldon to ensure you coat coat the binding more is better than not enough, once the binding is coated rub gently it back and forth against the wood Weldon actually melts the binding and makes it soft it can bend around contours pretty easy. Once your happy with the shape use masking tape to keep it tight against the wood. Don't apply to much pressure with the tape so it squeezes out a lot of Weldon - else you'll have bumps. You want just enough pressure to keep it in place while the Weldon sets up some.
B2.jpg


Of course you need to cut a channel or (shelf) for the binding to sit on here at the neck it's .062 x .125. Much of his can be done with a router but there is still some to cut by hand. An assortment of sharp chisels and a razor blade assortment seems to work well.
B3.jpg


After the Weldon cures enough to pull the tape off trim excess with a Japanese saw - this on is from HF sharp as a pack of razor blades, I personally consider it one of those HF gems.
B4%20.jpg


On the fretboard it's a good Idea to get the excess weldon out of the fret tang slots before it fully sets and hardens like a rock. Again the HF Japanese saw is thin enough to get in the slot without doing any damage and sharp enough to pull the semi hardened weld out out of the slot.

B5.jpg


Finish by scraping flush with a long razor blade, try and not tilt the blade to accidentally make the binding lower than the wood.
B6.jpg


Corners can be shaped with a lat needle file. Don't worry to much about getting the final profile on the corners. At this point the binding is still pretty soft, you'll want to let it fully cure then to can final shape the corners. Of course the nut is very important area on a guitar so you want to clean that area up real well with a needle file and test fit - Ah just right
B7.jpg


Before the Weldon is fully cured it's a good idea to sight the fretboard. If needed, you can stick a razor blade in the low sopts and gently pry the binding away from the wood to make it straight. This time there was no need to straighten any binding out, it went in great.
B8.jpg


Another important measurement on a guitar is the 12 fret, this on should be 2 1/16" which it is :)
B9.jpg


Here I'm using a router fitted with a 5/8 OD template bushing and 1/2" straight bit to cut the 1/16" binding ledge to block the fretboard end.
B10.jpg


With the end blocked and trimmed, rough scraped and profiled. I'm done till the Weldon is fully cured, depending on temp it's about 2 hours. I'll do a little more work on the binding after it fully cured, but once it is fully cured you can treat it like wood and even sand it if you have to... ABS is the same stuff they make Lego's out of so you know how tough that is when set up.
B11.jpg


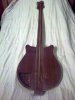
Binding not only protects the edges from bangs and dings it also gives a guitar a "finished" look.
B12.jpg
 
Last edited:

CrealBilly

New User
Jeff
Couple more pics - Bound all the way around, the back of the neck is hand drawn to a thin profile, neck tilt set, wings glued on and leveled, 1st seal coat. Really wild colors in this walnut... Think I should paint it? The bridge is on back order :( There is a little clean up work to do around the heal area and the end needs to be trimmed, but other than that this one will ne ready to have the fret board marked, radius and frets installed soon.

Front
2012-10-30_00-29-24_695.jpg


Back
2012-10-30_00-29-00_882.jpg
 

Attachments

  • 2012-10-30_00-29-00_882.jpg
    2012-10-30_00-29-00_882.jpg
    121.2 KB · Views: 89
Status
Not open for further replies.

Premier Sponsor

Our Sponsors

Top